Android Image Upload Example using PHP with Source Code
While learning Android, most of the developers find it difficult to upload an Image to Server from Android App using PHP Webservice as server-side. Sometimes you do nothing wrong in Android Code but Image doesn’t upload to the server. Sometimes you do not follow the same method to receive Image on the server as android application sending method.
There are several ways to upload Image or any other file from Android to Server using PHP Webservice. I’m going to upload the image in base64 encoded form. I’ll share the source code for both Android and PHP.
Web Service will also save the image on the server after receiving it.
How Does It Work?
- Select the Image from Phone Gallary
- Encode the Image to Base64
- Send the Image as POST Parameter using PHP Webservice
- Webservice will receive encoded image
- Decode Image and save it on the Server
Source Code
Android:
Now it’s time to do some Android coding for uploading the image. In this app, for uploading the image we’re using Retrofit. For to add the Retrofit in Android app add the dependencies in your app. Below are the dependencies.
implementation 'com.squareup.retrofit2:retrofit:2.3.0'
implementation 'com.squareup.retrofit2:converter-gson:2.3.0'
implementation 'com.squareup.okhttp3:logging-interceptor:3.9.0'
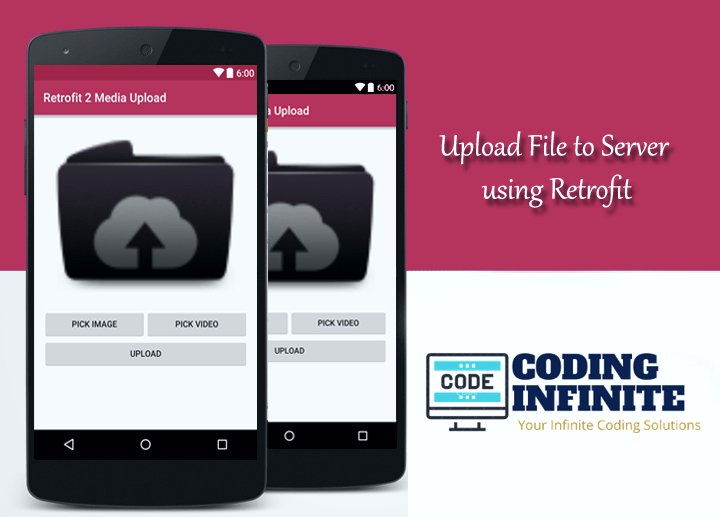
Before starting the Android app coding I wanna show you the demo of the app.
Now you see the demo right, let’s start making the app by designing its UI. Below is the activity_main.xml file.
<?xml version="1.0" encoding="utf-8"?>
<RelativeLayout xmlns:android="http://schemas.android.com/apk/res/android"
    xmlns:tools="http://schemas.android.com/tools"
    android:layout_width="match_parent"
    android:layout_height="match_parent"
    tools:context=".MainActivity">

    <ImageView
        android:id="@+id/imageView"
        android:layout_width="match_parent"
        android:layout_height="200dp"
        android:contentDescription="@null"
        android:scaleType="centerCrop" />

    <LinearLayout
        style="?android:attr/buttonBarStyle"
        android:layout_width="match_parent"
        android:layout_height="wrap_content"
        android:layout_alignParentBottom="true"
        android:orientation="horizontal"
        android:weightSum="2">

        <Button
            android:id="@+id/selectImageButton"
            android:layout_width="0dp"
            android:layout_height="wrap_content"
            android:layout_marginEnd="10dp"
            android:layout_weight="1"
            android:text="@string/select_image"
            tools:ignore="ButtonStyle" />

        <Button
            android:id="@+id/uploadImageButton"
            android:layout_width="0dp"
            android:layout_height="wrap_content"
            android:layout_weight="1"
            android:text="@string/select_image"
            tools:ignore="ButtonStyle" />

    </LinearLayout>

</RelativeLayout>
In our MainActivity when the user clicks on the selectImage button it will open the Gallery app and let you select the image. Below is the code for when a user presses the select image button.
findViewById<Button>(R.id.selectImageButton).setOnClickListener {
            val intent = Intent(
                    Intent.ACTION_PICK, android.provider.MediaStore.Images.Media.EXTERNAL_CONTENT_URI)
            startActivityForResult(Intent.createChooser(intent, "Select Picture"), PICK_IMAGE_REQUEST_CODE)
}
Now when the user selects the image from the Gallery app the result will come in the onActivityResult method. Below is the MainActivity onActivityResult method.
override fun onActivityResult(requestCode: Int, resultCode: Int, data: Intent?) {
     super.onActivityResult(requestCode, resultCode, data)
     if (requestCode == PICK_IMAGE_REQUEST_CODE && RESULT_OK == resultCode) {
         data?.let {
             try {
                 bitmap = uiHelper.decodeUri(this, it.data)
                 imageView.setImageBitmap(bitmap)
             } catch (e: Exception) {
                 if (bitmap != null) imageView.setImageBitmap(bitmap)
             }
         }
     }
 }
After the user selects an image the onActivityResult method will be called. So, we store the image as Bitmap in our global bitmap object. Before proceeding next you guys see that we’re decoding the image with a decodeUri method to get the resulted bitmap. Below is the decodeUri method.
@Throws(FileNotFoundException::class)
fun decodeUri(context: Context, selectedImage: Uri): Bitmap {
    val o = BitmapFactory.Options()
    o.inJustDecodeBounds = true
    BitmapFactory.decodeStream(context.contentResolver.openInputStream(selectedImage), null, o)
    val REQUIRED_SIZE = 140
    var width_tmp = o.outWidth
    var height_tmp = o.outHeight
    var scale = 1
    while (true) {
        if (width_tmp / 2 < REQUIRED_SIZE || height_tmp / 2 < REQUIRED_SIZE) {
            break
        }
        width_tmp /= 2
        height_tmp /= 2
        scale *= 2
    }
    val o2 = BitmapFactory.Options()
    o2.inSampleSize = scale
    return BitmapFactory.decodeStream(context.contentResolver.openInputStream(selectedImage), null, o2)
}
So, we select the image and store the resulted image in the bitmap object. Now we only need to upload the image the user press the Upload Image button.
findViewById<Button>(R.id.uploadImageButton).setOnClickListener {
            if (bitmap != null) {
                val imageBytes = uiHelper.getImageBytes(bitmap!!)
                uploadImage(imageBytes)
            } else
                Toast.makeText(this, "No image selected", Toast.LENGTH_SHORT).show()
        }
To upload the image first we check if a user selects the image before or not. Second, we need to convert the bitmap into Base64 ByteArray and third upload the image bytes to the server. Below is the getImageBytes method.
fun getImageUrl(bitmap: Bitmap): String {
    val byteArrayOutputStream = ByteArrayOutputStream()
    bitmap.compress(Bitmap.CompressFormat.JPEG, 100, byteArrayOutputStream)
    val bytes = byteArrayOutputStream.toByteArray()
    return Base64.encodeToString(bytes, Base64.DEFAULT)
}
The prep work is done. Now it’s time to upload the image bytes to the server. Below is the uploadImage method code.
private fun uploadImage(imageBytes: String) {
    ServiceApi.Factory.getInstance(this).uploadImage(imageBytes)
            .enqueue(object : Callback<StatusMessageResponse> {
                override fun onFailure(call: Call<StatusMessageResponse>?, t: Throwable?) {
                    Toast.makeText(MainActivity.this,"Image uploaded",Toast.LENGTH_SHORT).show()
                    // Image uploaded successfully
                }

                override fun onResponse(call: Call<StatusMessageResponse>?, response: Response<StatusMessageResponse>?) {
                    // Error Occurred during uploading
                }
            })

}
The ServerApi is the instance of a Retrofit interface. Below is the ServerApi class.
interface ServiceApi {

    companion object {
        private const val BASE_URL = ""  // Base url of your hosting
    }

    @FormUrlEncoded
    @POST("")   // end_point url
    fun uploadImage(@Field("image_bytes") imageBytes: String): Call<StatusMessageResponse>

    class Factory {

        companion object {
            private var service: ServiceApi? = null
            fun getInstance(context: Context): ServiceApi? {
                if (service == null) {
                    val builder = OkHttpClient().newBuilder()
                    builder.readTimeout(15, TimeUnit.SECONDS)
                    builder.connectTimeout(15, TimeUnit.SECONDS)
                    builder.writeTimeout(15, TimeUnit.SECONDS)
                    if (BuildConfig.DEBUG) {
                        val interceptor = HttpLoggingInterceptor()
                        interceptor.level = HttpLoggingInterceptor.Level.BODY
                        builder.addInterceptor(interceptor)
                    }
                    val file = File(context.cacheDir, "cache_dir")
                    if (!file.exists())
                        file.mkdirs()
                    val cacheSize: Long = 10 * 1024 * 1024 // 10 MiB
                    val cache = okhttp3.Cache(file, cacheSize)
                    builder.cache(cache)
                    val retrofit: Retrofit
                    retrofit = Retrofit.Builder()
                            .client(builder.build())
                            .addConverterFactory(GsonConverterFactory.create())
                            .baseUrl(BASE_URL)
                            .build()
                    service = retrofit.create(ServiceApi::class.java)
                    return service
                } else {
                    return service
                }
            }
        }
    }
}
In this article, I’m not gonna show you how the Retrofit works and how to create its instance. You can learn about Retrofit from this article. Each call created from ServerApi can be synchronous or asynchronous HTTP request to the remote web server.
Note: There are two things that you need to do. First, you need to add your web server BASE_URL. Second, add the end-point URL to POST annotation. And in the end, don’t forget to add the Internet permission in the Manifest file.
Alright, our code for Android App is complete. You can get the complete source code of the above app from GitHub.
PHP:
// receive image as POST Parameter
$image = str_replace('data:image/png;base64,', '', $_POST['image']);
$image = str_replace(' ', '+', $image);
// Decode the Base64 encoded Image
$data = base64_decode($image);
// Create Image path with Image name and Extension
$file = '../images/' . "MyImage" . '.jpg';
// Save Image in the Image Directory
$success = file_put_contents($file, $data);


Thanks it is good real
any fool can upload image via PHP.
make tutorial on how you can upload any type of file from your android to PHP.
you are just wasting your time on SEO