How To Create Animations In Android Application
Did you know that there are more than 2.7 million apps on the Google Play Store as of 2019?
The demand and need for mobile apps are so high, that Google reports releasing about 3000 plus apps every day on its Play Store!
The app market seems to appeal to Millennials much more than any other generation, with 21% of Millennials opening an app 50+ times a day!
Numbers seem to be in favor of mobile apps with 57% of all digital media usage coming from mobile apps
Google is a much-loved company worldwide and is synonymous with technology, creativity, and innovation.
They’ve earned a reputation of being the best and most reliable in the Android market business, and rightly so.
Having your app on the Google Play Store will provide good visibility and will reach your desired audience. So ho do you set up making your app stand out in the Android market?
To have edge over competitors, you have got to have an appealing visual language. High resolution, well-designed graphics, and animations are synonymous with great visual appeal.
The Android framework provides a set of powerful APIs for applying animation to UI elements.
Types of Animations
There are three animation systems for Android Apps.
Property Animation
This lets you animate any property of any object, regardless of whether it shows on the screen or not. This is the preferred method of animation in Android.
To animate an object, you must specify the object property and how long you want to animate it.
View Animation
Also known as “tween animation”, you can use this to animate objects in a view. This is limited to simple sequential transformations, such as moving, resizing and rotations.
Drawable Animation
This lets you load a sequence of “Drawable” resources or images, frame by frame. This is the traditional method of animation, which uses a series of images played in order, like a roll film.
Let us know now see how we can create animations.
Android Animation Using XML Code
With this, you can cover basic animations like fade in, fade out, scale, rotation, slide up and down and so on.
The XML animations code is quite simple to use and requires one to use the XML file in Java.
To do this, open the Android Studio and create a new project with the “Empty Activity” template.
Then you must create an anim resource directory that is meant to store all your animation files.
To put it very simply, right-click on “res directory” > New > Android Resource Directory > anim.
The next step is to add the animation in the file. Add the below code for a blink effect in your blink.xml file.
<?xml version="1.0" encoding="utf-8"?>
<set xmlns:android="http://schemas.android.com/apk/res/android">
    <alpha android:fromAlpha="0.0"
      android:toAlpha="1.0"
      android:interpolator="@android:anim/accelerate_interpolator"
      android:duration="800"
      android:repeatMode="reverse"
      android:repeatCount="infinite"/>
</set>
Next, load the animation and set to view in activity to the blink effect.
public class BlinkActivity extends Activity{
TextView textMessage;
// Animation
Animation animBlink;
@Override
protected void onCreate(Bundle savedInstanceState) {
    super.onCreate(savedInstanceState);
    setContentView(R.layout.activity_blink);
    textMessage = (TextView) findViewById(R.id.textMessage);
    textMessag.setText(Welcome to Android Code Portal);
    // load the animation
    animBlink = AnimationUtils.loadAnimation(getApplicationContext(),
    R.anim.blink);
   // start the animation
    textMessage.startAnimation(animBlink);}
}
Animate Bitmaps
Drawable animations are used to animate a bitmap graphic like an icon or an illustration. Sometimes, images may need to be animated on-screen.
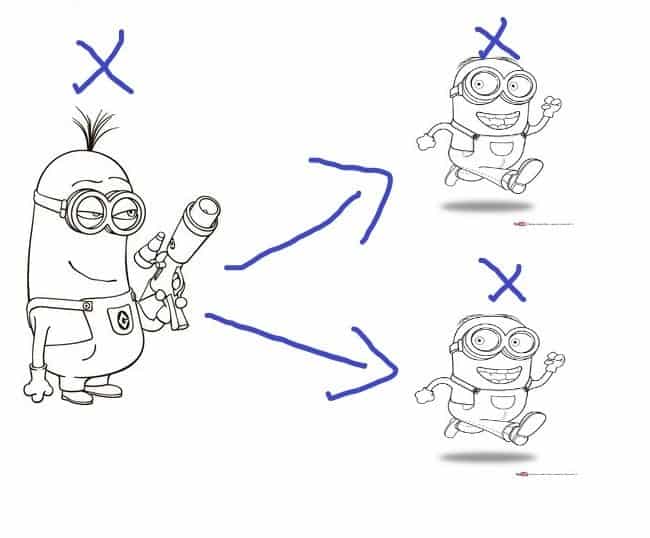
For example, if you want to morph one icon into another once it has been tapped (turning a play button to a pause button). There are two ways of doing this.
Use AnimationDrawable
This allows you to choose many static drawable files, which will then be displayed one at a time to create an animation.
You can define the frames of an animation in your code using a single XML file that lists the sequence of frames that composes the animation.
This particular XML file belongs In the “res/drawable/” directory of the concerned project. The instructions will consist of the order and duration for each frame.
The XML file consists of a <animation-list> which contains the <items> that will be played one after another. Below is an example of an XML file for a Drawable animation:
<animation-list xmlns:android="http://schemas.android.com/apk/res/android"
    android:oneshot="true">
    <item android:drawable="@drawable/rocket_thrust1" android:duration="200" />
    <item android:drawable="@drawable/rocket_thrust2" android:duration="200" />
    <item android:drawable="@drawable/rocket_thrust3" android:duration="200" />
</animation-list>
This animation cycle will run for three frames. If the “android:oneshot” attribute of the list is set to “false”, then the animation will loop.
We can also apply the above animation for an “ImageView” where it can be added as the background animation to a View and then called to play.
In the code below, the animation is added to an “ImageView” and then animated when the screen is touched.
AnimationDrawable rocketAnimation;
public void onCreate(Bundle savedInstanceState) {
  super.onCreate(savedInstanceState);
  setContentView(R.layout.main);

  ImageView rocketImage = (ImageView) findViewById(R.id.rocket_image);
  rocketImage.setBackgroundResource(R.drawable.rocket_thrust);
  rocketAnimation = (AnimationDrawable) rocketImage.getBackground();

  rocketImage.setOnClickListener(new View.OnClickListener() {
      @Override
      public void onClick(View view) {
        rocketAnimation.start();
      }
  });
}
Use AnimatedVectorDrawable
This is a type of drawable that is scalable, without getting pixelated. You normally define animated vector drawable in three XML files:
A vector drawable with the <vector> element in res/drawable/. Right-click on res/drawable > New Drawable Resource File.
Enter the chosen name. use the “android:name” attribute to assign a unique name to groups and paths, so you can refer to them from your animator definitions.
<!-- res/drawable/vectordrawable.xml -->
<!-- Source: Android Developer Website -->
<vector xmlns:android="http://schemas.android.com/apk/res/android"
    android:height="64dp"
    android:width="64dp"
    android:viewportHeight="600"
    android:viewportWidth="600">
    <group
        android:name="rotationGroup"
        android:pivotX="300.0"
        android:pivotY="300.0"
        android:rotation="45.0" >
        <path
            android:name="v"
            android:fillColor="#000000"
            android:pathData="M300,70 l 0,-70 70,70 0,0 -70,70z" />
    </group>
</vector>
Animated vectors drawable with the <animated-vector> element in res/drawable/. This refers to the groups and paths in the vector drawable by their names.
<animated-vector xmlns:android="http://schemas.android.com/apk/res/android"
  android:drawable="@drawable/vectordrawable" >
    <target
        android:name="rotationGroup"
        android:animation="@animator/rotation" />
    <target
        android:name="v"
        android:animation="@animator/path_morph" />
</animated-vector>
One or more object animators with the <objectAnimator> element in res/animator/. In the example below, the first animator rotates the target group 360 degrees.
<objectAnimator
    android:duration="6000"
    android:propertyName="rotation"
    android:valueFrom="0"
    android:valueTo="360" />
Animation Between Activities
In this kind of animation refers to transitions between your activities.
This is supported by Android 5.0 (API level 21) or higher.
Here, you can apply simple entry and exit transitions supported by Android:
- Explode – moves in and out from the center of the screen
- Slide – slides in from the side of the screen and slides out from the other side
- Fade – used to play with the opacity of the view while entering into the screen
Before going into the details of that, you need to know Price to Create an App. It will help you to know what the animation in the app will cost you.
To animate between activities, you must first define the style with the “android:windowActivityTransitions” attribute which enables windows content transitions. See the example below.
<style name="BaseAppTheme" parent="android:Theme.Material">
  <!-- enable window content transitions -->
  <item name="android:windowActivityTransitions">true</item>

  <!-- specify enter and exit transitions -->
  <item name="android:windowEnterTransition">@transition/explode</item>
  <item name="android:windowExitTransition">@transition/explode</item>

  <!-- specify shared element transitions -->
  <item name="android:windowSharedElementEnterTransition">
    @transition/change_image_transform</item>
  <item name="android:windowSharedElementExitTransition">
    @transition/change_image_transform</item>
</style>
The last step is to start the Activity by enabling transition:
startActivity(intent,ActivityOptions.makeSceneTransitionAnimation(this).toBundle())
Animate UI Visibility and Motion
Subtle animations, that aren’t jarring to the eye are needed to change the visibility or position of views in your layout.
The property animation system provided by the “android.animation” package is available on Android 3.0 and higher (API level 11). This can be used to move, reveal or hide views in a layout.
For example, changing the position properties makes the view move across the screen and on changing the alpha property, the view fades out.
Check this link to understand how to do this. Common animations include changing view visibility with crossfade or circular reveal, swapping views with a card flip and changing the view size with a zoom animation.
There’s so much more you can do with animation on Android! This is just the beginning. Check this link for more in-depth information on Android animations, straight from the experts.
There
are also lots of libraries you can refer to if you want to implement some cool
and quirky animations. You can find the top libraries here.
Conclusion
Here,
we have provided you with a step-by-step guide to create animation in Android
applications. We hope this article proves to be a great value to you.
If you have any questions or suggestions related to this blog, then feel free
to comment on them in the comment box. Thank You.!