Creating Email Sending Application using Asp.net Core | Open Source
Hey Guys, In this Article, we’re going to Create a very simple Email Sending Contact Form Application using C# with Asp.net Core. We’ll use a beautiful HTML5 Contact Form Template by colorlib for this Tutorial.

Setting Up Project
Let’s start by creating a new Asp.net Core Project. I’m going to create an Empty Project using Dotnet CLI.
Run this Command to create a new Empty Project.
dotnet new Web
Update your “Startup.cs” to ready your Project.
public class Startup
{
    public void ConfigureServices(IServiceCollection services)
    {
        services.AddMvc();
    }

    public void Configure(IApplicationBuilder app, IHostingEnvironment env)
    {
        if (env.IsDevelopment())
        {
            app.UseDeveloperExceptionPage();
        }
        app.UseStaticFiles();
        app.UseMvc(routes =>
        {
            routes.MapRoute(
                name: "default",
                template: "{controller=MailSender}/{action=Index}/{id?}");
        });
    }
}
Create 3 Folders as “Controllers”, “Views” & “wwwroot” at the root directory of your project.
Creating Controller
Inside your “Controllers” Folder Create a new File as “MailSenderController.cs” & Add this Code.
using System.Net;
using System.Net.Mail;
using FluentEmail.Core;
using Microsoft.AspNetCore.Mvc;

public class MailSenderController : Controller
{
    public ActionResult Index()
    {
        return View();
    }

    public string SendEmail(string Name, string Email, string Message){

        try
        {
            // Credentials
            var credentials = new NetworkCredential("[email protected]", "your-password");

            // Mail message
            var mail = new MailMessage()
            {
                From = new MailAddress("[email protected]"),
                Subject = "Email Sender App",
                Body = Message
            };

            mail.IsBodyHtml = true;
            mail.To.Add(new MailAddress(Email));

            // Smtp client
            var client = new SmtpClient()
            {
                Port = 587,
                DeliveryMethod = SmtpDeliveryMethod.Network,
                UseDefaultCredentials = false,
                Host = "smtp.gmail.com",
                EnableSsl = true,
                Credentials = credentials
            };

            client.Send(mail);

            return "Email Sent Successfully!";
        }
        catch (System.Exception e)
        {
            return e.Message;
        }

    }
}
Don’t Forget to Update your Email & Password Credentials in this Line of Code in the above Code.
var credentials = new NetworkCredential("[email protected]", "your-password");
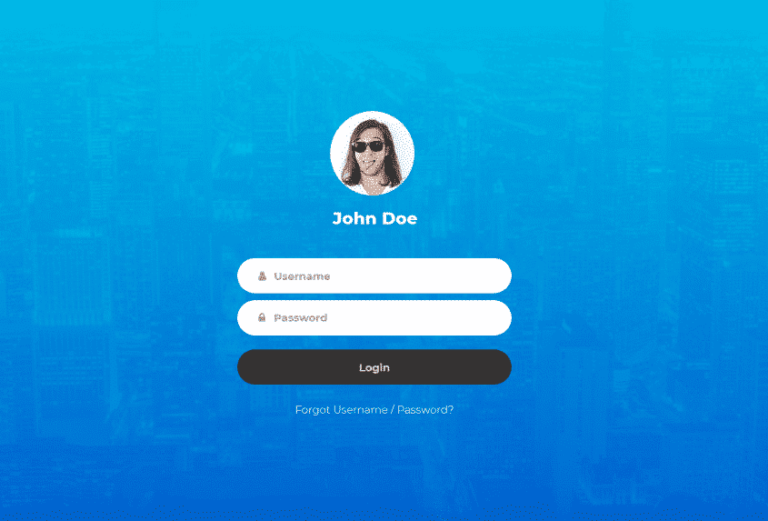
Setting Up Contact Form Template
Now, we need to Create a Contact Form for Sending Emails.
I’m going to use this beautiful Email Sending Template by colorlib.
So, go to this Link & download the Source Code of Contact Page.
Extract the downloaded file & you’ll get this

Now, copy all the folders from the above image & paste inside the “wwwroot” directory in your project which we have created earlier.
Creating View
Create a new Folder inside the “Views” Folder as “MailSender” at the root directory of your Project.
Now, create a new file inside “MailSender” Folder as “Index.cshtml” & Add this Code.
<!DOCTYPE html>
<html lang="en">
<head>
  <title>Contact V2</title>
  <meta charset="UTF-8">
  <meta name="viewport" content="width=device-width, initial-scale=1">
<!--===============================================================================================-->
  <link rel="icon" type="image/png" href="images/icons/favicon.ico"/>
<!--===============================================================================================-->
  <link rel="stylesheet" type="text/css" href="vendor/bootstrap/css/bootstrap.min.css">
<!--===============================================================================================-->
  <link rel="stylesheet" type="text/css" href="fonts/font-awesome-4.7.0/css/font-awesome.min.css">
<!--===============================================================================================-->
  <link rel="stylesheet" type="text/css" href="vendor/animate/animate.css">
<!--===============================================================================================-->
  <link rel="stylesheet" type="text/css" href="vendor/css-hamburgers/hamburgers.min.css">
<!--===============================================================================================-->
  <link rel="stylesheet" type="text/css" href="vendor/select2/select2.min.css">
<!--===============================================================================================-->
  <link rel="stylesheet" type="text/css" href="css/util.css">
  <link rel="stylesheet" type="text/css" href="css/main.css">
<!--===============================================================================================-->
</head>
<body>

  <div class="bg-contact2" style="background-image: url('images/bg-01.jpg');">
    <div class="container-contact2">
      <div class="wrap-contact2">
        <span class="contact2-form-title">
          Contact Us
        </span>

        <div class="wrap-input2 validate-input" data-validate="Name is required">
          <input class="input2" type="text" id="name">
          <span class="focus-input2" data-placeholder="NAME"></span>
        </div>

        <div class="wrap-input2 validate-input" data-validate = "Valid email is required: [email protected]">
          <input class="input2" type="text" id="email">
          <span class="focus-input2" data-placeholder="EMAIL"></span>
        </div>

        <div class="wrap-input2 validate-input" data-validate = "Message is required">
          <textarea class="input2" id="message"></textarea>
          <span class="focus-input2" data-placeholder="MESSAGE"></span>
        </div>

        <div class="container-contact2-form-btn">
          <div class="wrap-contact2-form-btn">
            <div class="contact2-form-bgbtn"></div>
            <button class="contact2-form-btn" onclick="SendEmail()">
              Send Your Message
            </button>
          </div>
        </div>
      </div>
    </div>
  </div>

<!--===============================================================================================-->
  <script src="vendor/jquery/jquery-3.2.1.min.js"></script>
<!--===============================================================================================-->
  <script src="vendor/bootstrap/js/popper.js"></script>
  <script src="vendor/bootstrap/js/bootstrap.min.js"></script>
<!--===============================================================================================-->
  <script src="vendor/select2/select2.min.js"></script>
<!--===============================================================================================-->
  <script src="js/main.js"></script>

  <script>

    function SendEmail(){

      $.ajax(
      {
        type: "POST",
        url: '@Url.Action("SendEmail", "MailSender")',
        data: {
          Name: $("#name").val(),
          Email: $("#email").val(),
          Message: $("#message").val()
        },
        error: function (result) {
          console.log(result);
        },
        success: function (result) {
          alert(result);
          $("#name").val("");
          $("#email").val("");
          $("#message").val("");
        }
      });
    }
  </script>

</body>
</html>
Testing Application
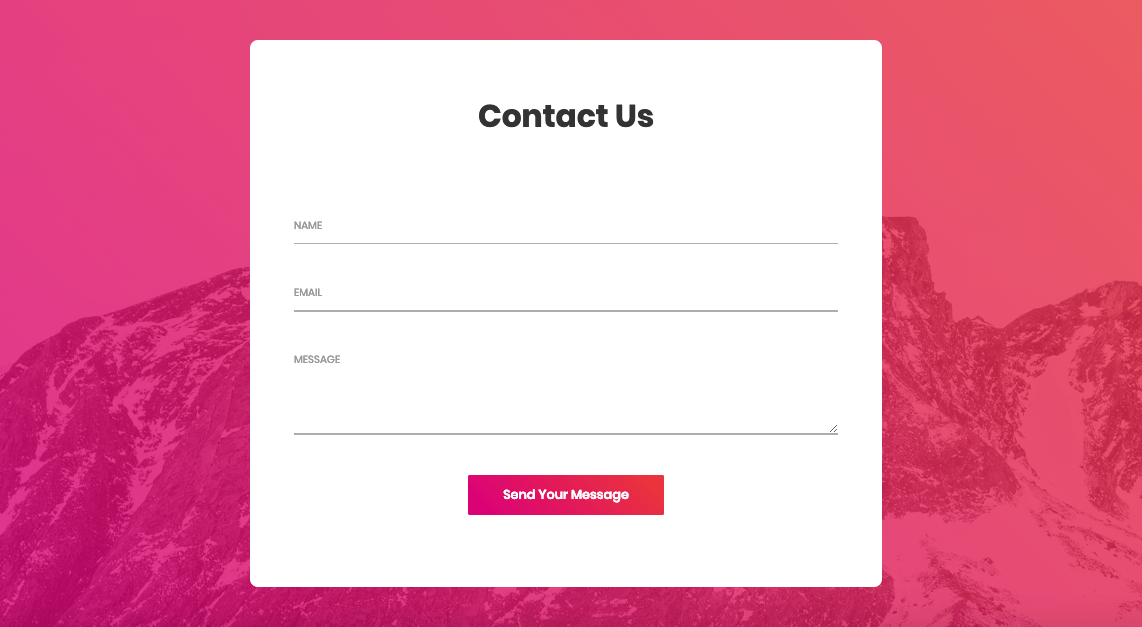
Run your Application, You’ll get this
Fill the Form & click on “Send Your Message” Button.
You’ll Get an Email at the Given Email Address.
Complete Source Code of the Example is also available at Github.
Secure Client Problem
You might get this Exception while trying to send an Email from your Local Host.
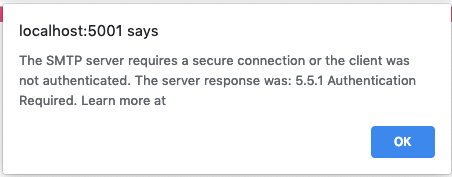
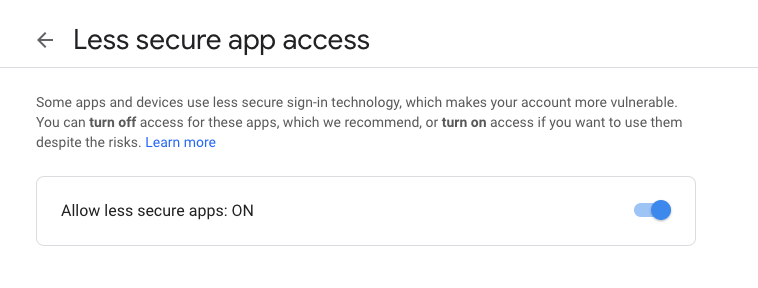
In this Case, you need to Allow Access for Less Secure Apps.
Using the same Google Account you have used in your Controller to Send Email, Go to this Link https://www.google.com/settings/security/lesssecureapps
& Allow Access for Less Secure App.
Now, Test your Application again, you’ll be able to receive Email from your Application.
Thank you for reading, Feel free to Comment below if you find any problem.
Here are more Articles you might be Interested
– Creating Admin Panel in Asp.net Core MVC – Step by Step Tutorial