CRUD Operations in Asp.net Core MVC
Yes, I’d say a large percentage of most applications I’ve worked on is basic CRUD(Create, Read, Update, Delete) operations. Especially In an Admin Panel, you need to repeat the CRUD Operations for every object in your system.
For creating beautiful & responsive UI, I’m using AdminLTE Template. So, In case if you missed Setting up AdminLTE in Asp.net Core, then you can find here => Setting up Admin Template in Asp.net Core MVC
Assuming that you have followed the above tutorial & setup your project, let’s start our Asp.net Core CRUD Operations Tutorial.
This is the 6th Part of Admin Panel Tutorial Series.
- Choosing Template for Admin Panel
- Creating a Database
- Setup AdminLTE Template in Asp.net Core MVC project
- Creating Models
- Login Page for Admin Panel
- CRUD(Create, Read, Update, Delete) Operations
- Creating Interactive Dashboards
- Audit Trail / Activity Logging
- Role-Based Authorization
- Error Logging
If you want to create Models from MySQL Database then you can follow this Article => Entity Framework Core Database First – Asp.Net Core Scaffold MySql DB
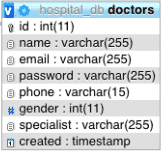
I’m performing my CRUD Operation on this Database Table. You can use your own Table.
First of all, create a Controller as “DoctorsController.cs” & Add this Code.
using System.Linq;
using AdminPanelTutorial.Models;
using Microsoft.AspNetCore;
using Microsoft.AspNetCore.Hosting;
using Microsoft.AspNetCore.Mvc;

namespace AdminPanelTutorial
{
    public class DoctorsController : Controller
    {
        MyDbContext db = new MyDbContext();
        public ActionResult Index()
        {
            return View(db.Doctors.ToList());
        }

        public ActionResult Create()
        {
            return View();
        }

        [HttpPost]
        public ActionResult CreateDoctor(Doctors doctor){
            db.Doctors.Add(doctor);
            db.SaveChanges();
            return RedirectToAction("Index", "Doctors");
        }

        [HttpPost]
        public bool Delete(int id){
            try
            {
                Doctors doctor = db.Doctors.Where(s => s.Id == id).First();
                db.Doctors.Remove(doctor);
                db.SaveChanges();
                return true;
            }
            catch (System.Exception)
            {
                return false;
            }

        }

        public ActionResult Update(int id){
            return View(db.Doctors.Where(s => s.Id == id).First());
        }

        [HttpPost]
        public ActionResult UpdateDoctor(Doctors doctor){
            Doctors d = db.Doctors.Where(s => s.Id == doctor.Id).First();
            d.Name = doctor.Name;
            d.Phone = doctor.Phone;
            d.Specialist = doctor.Specialist;
            db.SaveChanges();
            return RedirectToAction("Index", "Doctors");
        }
    }
}
* Update your Solution name
Code Explanation:
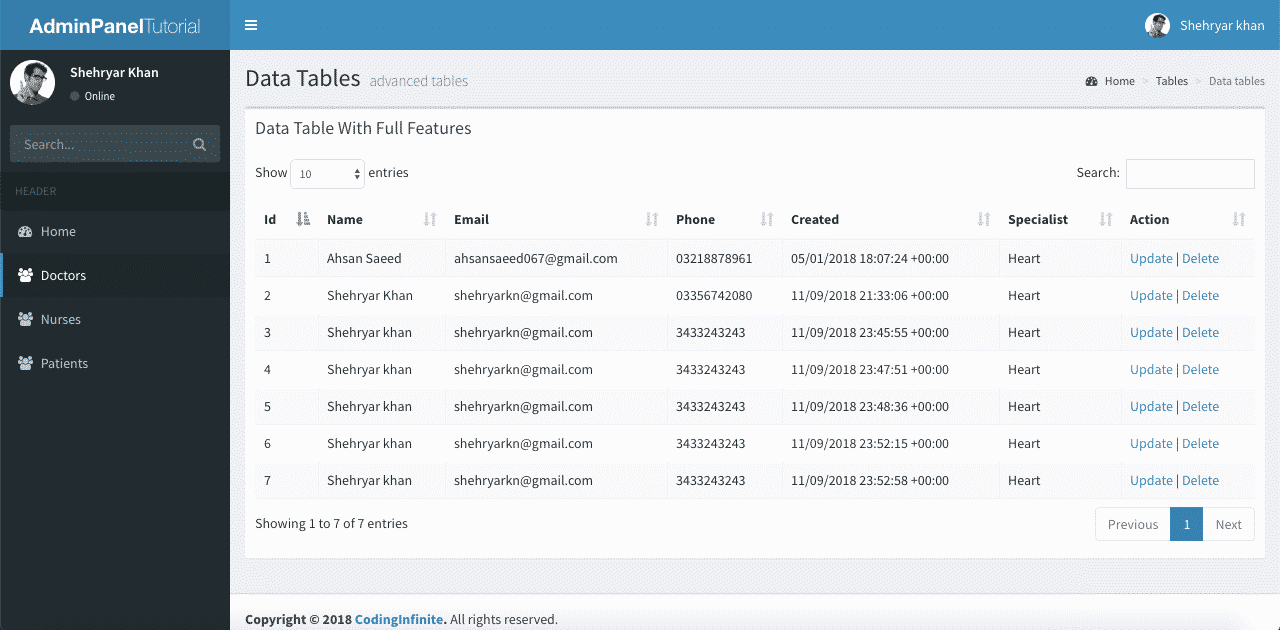
We have an Index Method to list all records from Doctors Table to our DataTable.
We have Create Method to open Create Doctor Form & when we Submit this Form our CreateDoctor will be used to Add Doctor into the Database.
You must Encrypt your Password before storing it into Database. You may follow this Tutorial for Password Hashing Code => C# Hashing algorithm class
We have only one Method to Delete Doctor because we’ll use Ajax to delete our Doctor.
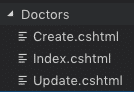
Now Create a new Folder as “Doctors” inside your “Views” Folder & Create these 3 Files inside “Doctors” Folders => “Index.cshtml”, “Create.cshtml”, “Update.cshtml”
Add this Code into your “Index.cshtml”
@model IEnumerable<AdminPanelTutorial.Models.Doctors>

<section class="content-header">
    <h1>
    Doctors
    </h1>
    <ol class="breadcrumb">
    <li><a href="#"><i class="fa fa-dashboard"></i> Home</a></li>
    <li class="active">Doctors</li>
    </ol>
</section>
<!-- Main content -->
<section class="content">
    <div class="row">
    <div class="col-xs-12">
        <div class="box">
        <div class="box-header">
            <h3 class="box-title">Manage Doctors</h3>
        </div>
        <!-- /.box-header -->
        <div class="box-body">
            <table id="example1" class="table table-bordered table-striped">
            <thead>
            <tr>
                <th>Id</th>
                <th>Name</th>
                <th>Email</th>
                <th>Phone</th>
                <th>Created</th>
                <th>Specialist</th>
                <th>Action</th>
            </tr>
            </thead>
            <tbody>
                @foreach (var item in Model)
                {
                    <tr>
                    <td>@Html.DisplayFor(modelItem => item.Id)</td>
                    <td>@Html.DisplayFor(modelItem => item.Name)</td>
                    <td>@Html.DisplayFor(modelItem => item.Email)</td>
                    <td>@Html.DisplayFor(modelItem => item.Phone)</td>
                    <td>@Html.DisplayFor(modelItem => item.Created)</td>
                    <td>@Html.DisplayFor(modelItem => item.Specialist)</td>
                    <td><a href="Doctors/Update/@item.Id">Update</a> | <a href="" onclick="Delete('@item.Id')">Delete</a></td>
                    </tr>
                }
            </table>
        </div>
        <!-- /.box-body -->
        </div>
        <!-- /.box -->
    </div>
    <!-- /.col -->
    </div>
    <!-- /.row -->
</section>

<!-- DataTables -->
<script src="~/bower_components/datatables.net/js/jquery.dataTables.min.js"></script>
<script src="~/bower_components/datatables.net-bs/js/dataTables.bootstrap.min.js"></script>

<!-- page script -->
<script>
    $(function () {
        $('#example1').DataTable();
    });
    function Delete(id){
        var txt;
        var r = confirm("Are you sure you want to Delete?");
        if (r == true) {

            $.ajax(
            {
                type: "POST",
                url: '@Url.Action("Delete", "Doctors")',
                data: {
                    id: id
                },
                error: function (result) {
                    alert("error");
                },
                success: function (result) {
                    if (result == true) {
                        var baseUrl="/Doctors";
                        window.location.reload();
                    }
                    else {
                        alert("There is a problem, Try Later!");
                    }
                }
            });
        }
    }
</script>
* Don’t forget to replace your Solution name with “AdminPanelTutorial” at the very First line of this Code
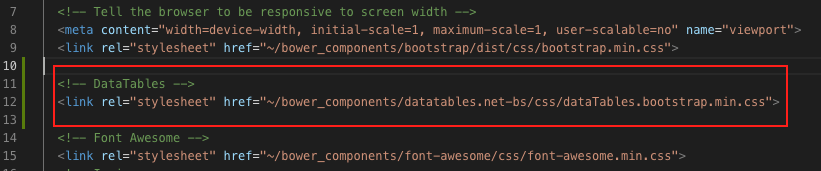
Add “DataTables” css file into your “_Layout.cshtml” (Created in the First Part of this Tutorial) after BootStrap css added at the start of the File
<!-- DataTables -->
<link rel="stylesheet" href="~/bower_components/datatables.net-bs/css/dataTables.bootstrap.min.css">
your “_Layout.cshtml” will look like this
You can see that I have already Added Ajax at the End of the Code above to Delete the Doctor Record from the Database.
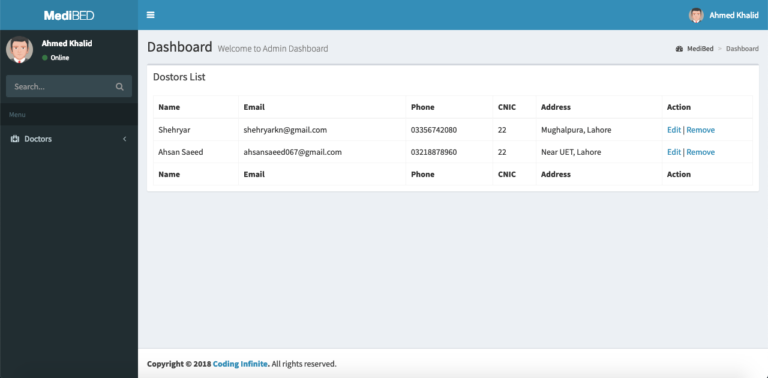
Now run your Project & go to http://localhost:port/Doctors (replace your port)
you’ll see All Doctors from your Database Table.
You can Also Test Your Delete Operation, It should work fine.
Let’s move Further & Add Code below into your “Create.cshtml”
<!-- Content Header (Page header) -->
<section class="content-header">
    <h1>
    Doctors
    </h1>
</section>
<!-- Main content -->
<section class="content container-fluid">
    <!-- Horizontal Form -->
    <div class="box box-info">
    <div class="box-header with-border">
        <h3 class="box-title">Add Doctor</h3>
    </div>
    <!-- /.box-header -->
    <!-- form start -->
    <form class="form-horizontal" method="post" action="CreateDoctor">
        <div class="box-body">
        <div class="form-group">
            <label for="inputEmail3" class="col-sm-2 control-label">Name</label>
            <div class="col-sm-10">
            <input type="text" class="form-control" name="Name" placeholder="Name">
            </div>
        </div>
        <div class="form-group">
            <label for="inputEmail3" class="col-sm-2 control-label">Email</label>
            <div class="col-sm-10">
            <input type="email" class="form-control" name="Email" placeholder="Email">
            </div>
        </div>
        <div class="form-group">
            <label for="inputPassword3" class="col-sm-2 control-label">Password</label>
            <div class="col-sm-10">
            <input type="password" class="form-control" name="Password" placeholder="Password">
            </div>
        </div>
        <div class="form-group">
            <label for="inputEmail3" class="col-sm-2 control-label">Phone</label>
            <div class="col-sm-10">
            <input type="text" class="form-control" name="Phone" placeholder="Phone">
            </div>
        </div>
        <div class="form-group">
            <label for="inputEmail3" class="col-sm-2 control-label">Specialist</label>
            <div class="col-sm-10">
            <input type="text" class="form-control" name="Specialist" placeholder="Specialist">
            </div>
        </div>
        </div>
        <!-- /.box-body -->
        <div class="box-footer">
        <button type="submit" class="btn btn-default">Cancel</button>
        <button type="submit" class="btn btn-info pull-right">Create</button>
        </div>
        <!-- /.box-footer -->
    </form>
    </div>
    <!-- /.box -->
</section>
Run your project & go to https://localhost:port/Doctors/Create
You’ll see this Page
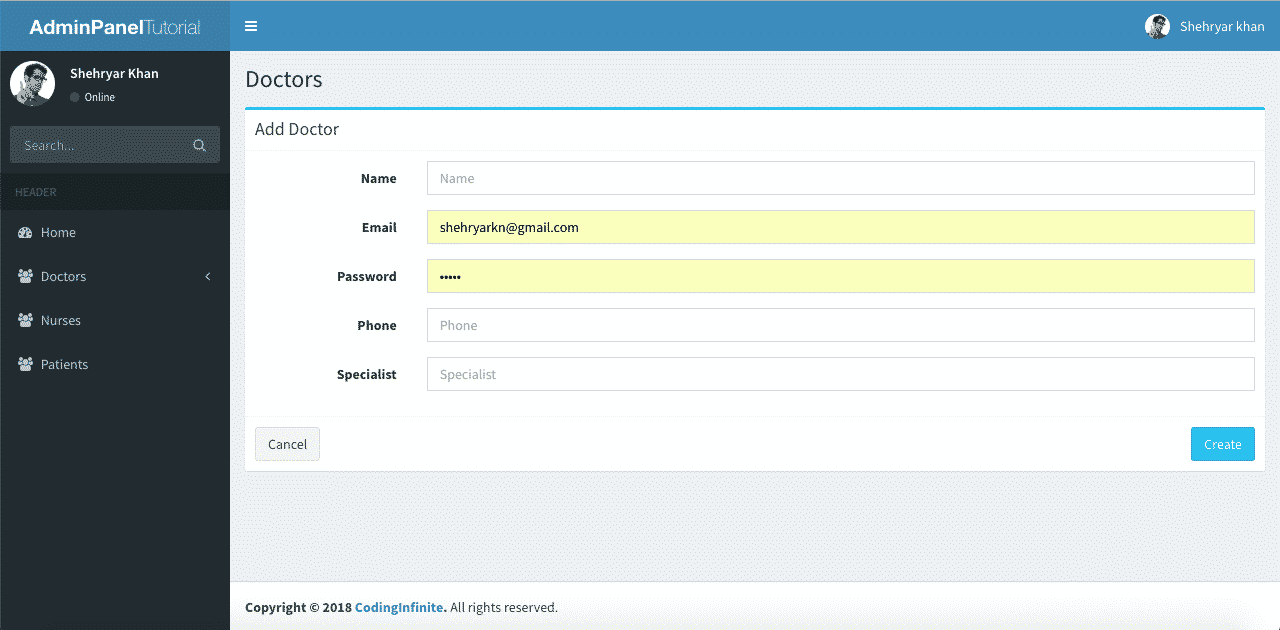
Try to create a new Doctor, It will Add new Doctor & redirect you to Index Page.
Now the last thing is our Update Operation.
Open your “Update.cshtml” file Add this Code
@model AdminPanelTutorial.Models.Doctors

<section class="content-header">
    <h1>
    Doctors
    </h1>
</section>
<!-- Main content -->
<section class="content container-fluid">
    <!-- Horizontal Form -->
    <div class="box box-info">
    <div class="box-header with-border">
        <h3 class="box-title">Update Doctor</h3>
    </div>
    <!-- /.box-header -->
    <!-- form start -->
    <form class="form-horizontal" method="post" action="/Doctors/UpdateDoctor">
        <div class="box-body">
        <div class="form-group">
            <label for="inputEmail3" class="col-sm-2 control-label">Email</label>
            <div class="col-sm-10">
            <input type="Email" class="form-control" name="Email" value="@Model.Email">
            </div>
        </div>
        <div class="form-group">
            <label for="inputEmail3" class="col-sm-2 control-label">Name</label>
            <div class="col-sm-10">
            <input type="text" class="form-control" name="Name" placeholder="Name" value="@Model.Name">
            </div>
        </div>
        <div class="form-group">
            <label for="inputEmail3" class="col-sm-2 control-label">Phone</label>
            <div class="col-sm-10">
            <input type="text" class="form-control" name="Phone" placeholder="Phone" value="@Model.Phone">
            </div>
        </div>
        <div class="form-group">
            <label for="inputEmail3" class="col-sm-2 control-label">Specialist</label>
            <div class="col-sm-10">
            <input type="text" class="form-control" name="Specialist" placeholder="Specialist" value="@Model.Specialist">
            </div>
        </div>
        <input type="hidden" name="Id" value="@Model.Id"/>
        </div>
        <!-- /.box-body -->
        <div class="box-footer">
        <button type="submit" class="btn btn-default">Cancel</button>
        <button type="submit" class="btn btn-info pull-right">Update</button>
        </div>
        <!-- /.box-footer -->
    </form>
    </div>
    <!-- /.box -->
</section>
* Don’t forget to replace your Solution name with “AdminPanelTutorial” at the very First line of this Code
Now run your Project & Update a Doctor Record.
I hope that everything is working fine & your CRUD operations are working perfectly. You can use your UI Template & Database Table for Performing your CRUD Operations. I used This AdminLTE Template just to Beautify our UI you can use your own.
You can also download the complete project from GitHub.
Comment If you find any Difficulty, I’m here to help you. I’ll reply you with Solution as soon as possible.


Have an example for dropdownlist in asp.net core?
Hi, Can you share this project on mail? Please, my mail id : [email protected]
GitHub link is given in the Article.
Hi there man. Nice article! Very nice! Could you also send-me the project too? On the Tutorial it’s missing the SEARCH and Pagination parts… thank you too much
Search & Pagination are the features of DataTables. Project source code link is given at the end of the Article.
Please send me your full project. And please send me MydbContext. cs file….
My email [email protected]
Now, it’s available at GitHub https://github.com/shehryarkn/Asp.Net-Core-CRUD-Operations-using-Admin-Template/tree/master