Android Google Map Street View Example
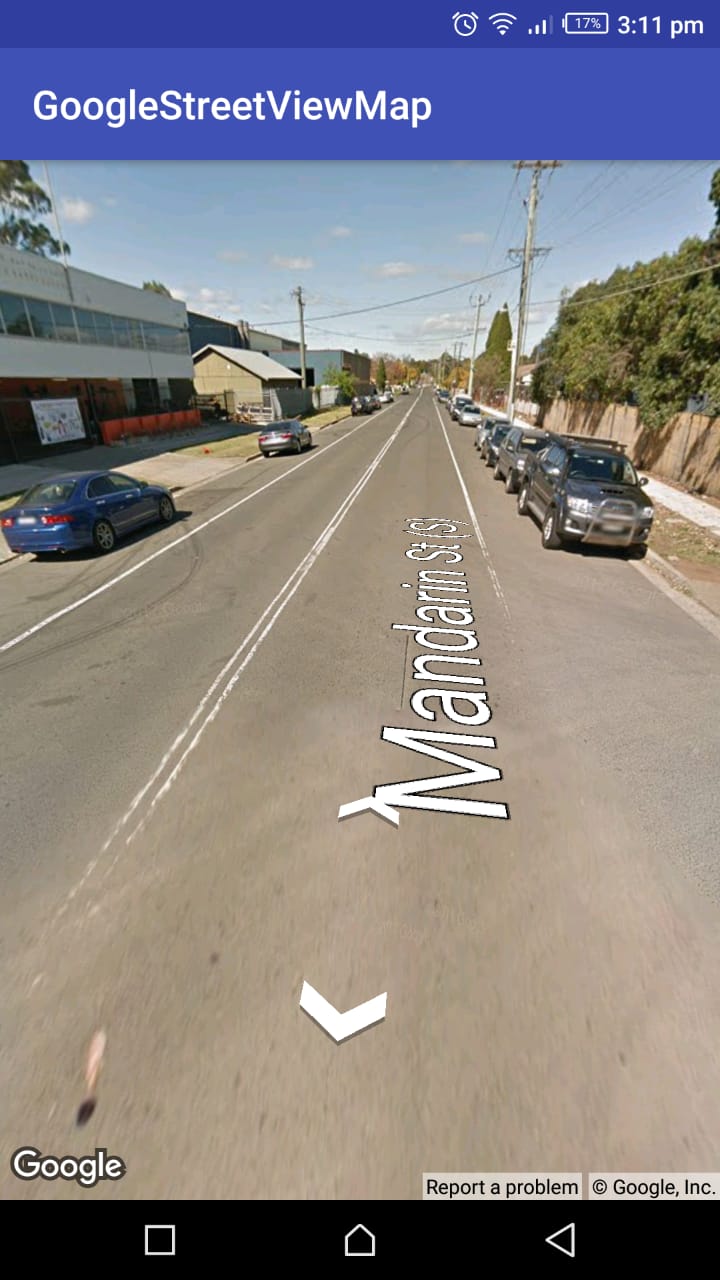
Hey, today we’re going to learn how we can integrate Google Map Street View into our Android app. Google Street View provides panoramic 360* views. The coverage available through the Google Map Android API v2 is the same as that for Google Map. You can read more about Street View here.
Google Map Setup
First, sign into your Google console developer account and Create Project. After that go to Library section and search for Android Map API. After that select and enable the key. When you enabled the API key go to Credential sections and copy the API key. It looks like AIzaSyD2gPrI2eAR*****************hoyI this.
Android App Setup
Create an empty project and open app level build.gradle file. After that add Google Map dependency.
implementation 'com.google.android.gms:play-services-maps:15.0.0'
Now go to Manifest file and add meta tags in application tag.
<meta-data
    android:name="com.google.android.gms.version"
    android:value="@integer/google_play_services_version" />

<meta-data
    android:name="com.google.android.geo.API_KEY"
    android:value="Paste Google Map API key" />
The first meta tag is for Google play services version. The second one is for Google Map API key.
Now the setup part is done, to show the Street Map add StreetViewPanoramaFragment into activity_main.xml. Below is the activity_main.xml.
<?xml version="1.0" encoding="utf-8"?>
<FrameLayout xmlns:android="http://schemas.android.com/apk/res/android"
    xmlns:tools="http://schemas.android.com/tools"
    android:layout_width="match_parent"
    android:layout_height="match_parent"
    tools:context=".MainActivity">

    <fragment
        android:id="@+id/streetViewMap"
        android:name="com.google.android.gms.maps.StreetViewPanoramaFragment"
        android:layout_width="match_parent"
        android:layout_height="match_parent" />

</FrameLayout>
Now go to the activity and get the StreetViewPanoramaFragment object and add OnStreetViewPanoramaReadyCallback. Below is the code for the StreetViewPanoramaFragment object.
streetViewPanoramaFragment = (StreetViewPanoramaFragment) getFragmentManager()
                .findFragmentById(R.id.streetViewMap);
        streetViewPanoramaFragment.getStreetViewPanoramaAsync(this);
For StreetViewPanoramaCallback we’re setting our activity reference. It means our activity has to override the abstract method of the callback. Below is the code for the StreetViewPanoramaCallback abstract method.
@Override
  public void onStreetViewPanoramaReady(StreetViewPanorama streetViewPanorama) {
      streetViewPanorama.setPosition(new LatLng(-33.873398, 150.976744));
      streetViewPanorama.setOnStreetViewPanoramaChangeListener(streetViewPanoramaChangeListener);
      streetViewPanorama.setOnStreetViewPanoramaClickListener(streetViewPanoramaClickListener);
  }
To set the location of StreetViewPanorama call setPosition method passing a LatLng object. You can also register the listener for when the user clicks on StreetViewMap or when the StreetViewPanorama change.
Below is the code for StreetViewMap click listener.
private StreetViewPanorama.OnStreetViewPanoramaClickListener streetViewPanoramaClickListener = new StreetViewPanorama.OnStreetViewPanoramaClickListener() {
 @Override
 public void onStreetViewPanoramaClick(StreetViewPanoramaOrientation streetViewPanoramaOrientation) {
 Point point = streetViewPanorama.orientationToPoint(streetViewPanoramaOrientation);
 if (point != null) {
 streetViewPanorama.animateTo(
 new StreetViewPanoramaCamera.Builder()
 .orientation(streetViewPanoramaOrientation)
 .zoom(streetViewPanorama.getPanoramaCamera().zoom)
 .build(), 1000);
 }
 }
};
onStreetViewPanorama method hits every time when the user clicks on the map. Also, we get StreetViewPanoramaOrientation object as a parameter, with a streetViewPanoramaOrientation object we can get the Point where the user clicks and simply animate to that point.
Below is the code for StreetViewPanorama change listener.
private StreetViewPanorama.OnStreetViewPanoramaChangeListener streetViewPanoramaChangeListener = new StreetViewPanorama.OnStreetViewPanoramaChangeListener() {
    @Override
    public void onStreetViewPanoramaChange(StreetViewPanoramaLocation streetViewPanoramaLocation) {
        Log.e(TAG, "Street View Panorama Change Listener");
    }
};
onStreetViewPanoramaChange method hits every time when we setPosition to StreetViewMap.
You can enable and disable user controlled gestures through methods on StreetViewPanorama.
Below is the code how you can disable the street names displayed on the ground. The default is true.
streetViewPanorama.setStreetNamesEnabled(false);
Below is the code how you can disable pinch zoom. The default is true.
streetViewPanorama.setZoomGesturesEnabled(false);
Below is the code how the user will be able to re-orient the camera by dragging.
streetViewPanorama.setPanningGesturesEnabled(false);
You can also set zoom level programmatically. Setting the zoom to 1.0 will magnify the image by a factor of 2. Below is the code how to set zoom level.
private static final float ZOOM_BY = 0.5f;
streetViewPanorama.animateTo(new StreetViewPanoramaCamera.Builder()
    .zoom(mStreetViewPanorama.getPanoramaCamera().zoom + ZOOM_BY)
    .build();
It’s a good approach to resume, stop and destroy the StreetViewPanoramaFragment object throughout the activity life-cycle.
@Override
protected void onResume() {
    super.onResume();
    streetViewPanoramaFragment.onResume();
}

@Override
protected void onStop() {
    super.onStop();
    streetViewPanoramaFragment.onStop();
}
@Override
protected void onDestroy() {
    super.onDestroy();
    if (streetViewPanoramaFragment != null)
        streetViewPanoramaFragment.onDestroy();
}
This is how you can use the activity life-cycle with the StreetViewPanoramaFragment object.
You can also store the state of StreetViewPanoramaFragment instance in an onSaveInstanceState method. Below is the example how you can store the state.
@Override
public void onSaveInstanceState(Bundle outState, PersistableBundle outPersistentState) {
    super.onSaveInstanceState(outState, outPersistentState);
    Bundle mStreetViewBundle = outState.getBundle(STREET_VIEW_BUNDLE);
    if (mStreetViewBundle == null) {
        mStreetViewBundle = new Bundle();
        outState.putBundle(STREET_VIEW_BUNDLE, mStreetViewBundle);
    }
    streetViewPanoramaFragment.onSaveInstanceState(mStreetViewBundle);
}
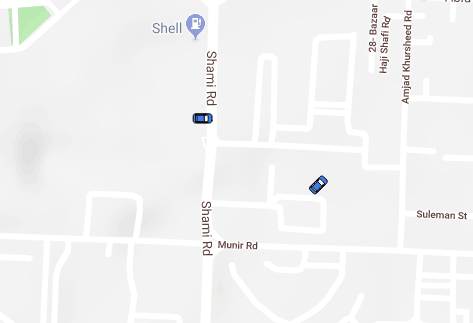
That’s it, I’m going to complete this blog here. If you guys want to learn how you can show the current location of a user on GoogleStreetViewMap, see this => Current Location With Google Map Street View Android.
Complete source code for the above example sees on GitHub.
I hope this blog gives you a good understanding of how you can add GoogleStreetViewMap in Android app. If you’ve any queries please do comment below.
Topic, You might be interested: Android Example : Animate marker on Google map with current location


Hello good Morning,
thanks.
I have a question, I’m currently working with StreetViewPanorama, and I’m able to navigate in streetview.
I wonder how I can save all streetView images in Jpeg format?
how do I do that?
Hey Jonathan,
Can you please tell me why do you want to save those images. Because I believe the library also saving all the images internally for better performance.
Thank you very much!!
Can I ask another question? (it’s not about the content of this article)
The question is that if I want to use “Google Cardboard” to run this street view program, is it executable?
(Because the effect of Cardboard is like “VR”, so I’m not sure the program can run on it)
If you don’t want to reply this question under this article, you can send your reply to my email
Thank you 🙂
p.s. my email address: [email protected]
Hello,
I want to ask that can we simulate the event of clicking white arrows showed on the street view? (like the motion at 0’16 of the video)
Is it possible that we write some code to control the motion by the program automatically?
Thank you 🙂
So, sorry for the late reply. I don’t think that maps SDK have this feature covered right now. But to confirm I asked your question on here.
Best Regards,
Ahsen Saeed
Thanks for your reply and helping me to ask my questions!
But I think you didn’t get the point I wanted to ask (Sorry for not explaining the question clearly)
My purpose is to “simulate” the event of clicking white arrow by the program itself, that is, we don’t have to click the white arrows by “our fingers” to move camera. Instead, we simulate the “click action” by the program. For example, when we execute the program, every 10 seconds the program will click one of the white arrow to move (I think the effect is like navigation)
Is it possible to achieve this goal?
Thank you 🙂
Alright, if you want to change the camera when the user current location changed like navigation. Then you need to do these following things.
1. First, you need to find the user current location and with that location, you can easily navigate the camera in which direction user headed.
2. When the user current location changed you need to get the bearing from Location object.
3. Now with bearing parameter, you need to build StreetViewPanoramaOrientation and pass the bearing value.
4. Finally, pass the orientation object into streetViewPanorama.animateTo method.
Example:
val bearing = location.getBearing()
val tilt = 90 // Tilt value is valid between -90 from +90
// Build StreetViewPanoramaOrientation
val orientation = StreetViewPanoramaOrientation.builder()
.bearing(bearing)
.tilt(tilt)
.build()
// Add orientation to streetViewPanorama
val cameraBuilder = StreetViewPanoramaCamera.Builder()
.orientation(orientation)
.zoom(zoomLevel)
.build()
val cameraDuration = 1000L
streetViewPanorama.animate(cameraBuilder, cameraDuration)
Note: With this approach the camera changes in which direction user headed and if you want to change camera with every ten seconds then you can easily add CountdownTimer. After every countdown, you can use the animateTo method.
Best Regards,
Ahsen Saeed