Setting up Admin Template in Asp.net Core MVC
In this part of the tutorial, we’re going to Setup AdminLTE Template in an Empty Asp.net Core MVC Project.
This is the 3rd Part of Admin Panel Tutorial Series.
- Choosing Template for Admin Panel
- Creating a Database
- Setup AdminLTE Template in Asp.net Core MVC project
- Creating Models
- Login Page for Admin Panel
- CRUD(Create, Read, Update, Delete) Operations
- Creating Interactive Dashboards
- Audit Trail / Activity Logging
- Role-Based Authorization
- Error Logging
Before starting this tutorial, I’m considering that you have downloaded the AdminLTE Template or have followed my previous Tutorial
I’m using VS Code, you can use Editor or IDE of your choice. Here’s my article on best .Net Core IDE.
Create a new Folder as AdminPanelTutorial
Open the folder in your VS Code & Create an Empty .Net Core MVC Project.
I’m using dotnet cli for creating a new Project. you can use the IDE for your choice.
So, run this command
dotnet new Web
A new project will be according with the default version of your installed SDK. Mine is .Net Core 2.2
If you want to create a project using a specific .Net Core Version, you can follow this article:
After that add this code to your “Startup.cs” File to ready your project for using MVC.
using System;
using System.Collections.Generic;
using System.Linq;
using System.Threading.Tasks;
using Microsoft.AspNetCore.Builder;
using Microsoft.AspNetCore.Hosting;
using Microsoft.AspNetCore.Http;
using Microsoft.Extensions.DependencyInjection;

namespace AdminPanelTutorial
{
    public class Startup
    {
        public void ConfigureServices(IServiceCollection services)
        {
            services.AddMvc();
        }

        // This method gets called by the runtime. Use this method to configure the HTTP request pipeline.
        public void Configure(IApplicationBuilder app, IHostingEnvironment env)
        {
            if (env.IsDevelopment())
            {
                app.UseDeveloperExceptionPage();
            }

            app.UseStaticFiles();

            app.UseMvc(routes =>
            {
                routes.MapRoute(
                    name: "default",
                    template: "{controller=Home}/{action=Index}/{id?}");
            });
        }
    }
}
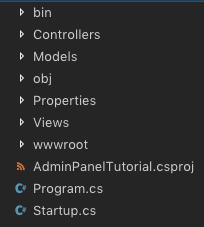
Now create Four folders “Controllers”, “Models”, “Views” & “wwwroot”.
After that, your project structure will look like this
Now unzip the AdminLTE zip file, you’ll see these files & folders inside.
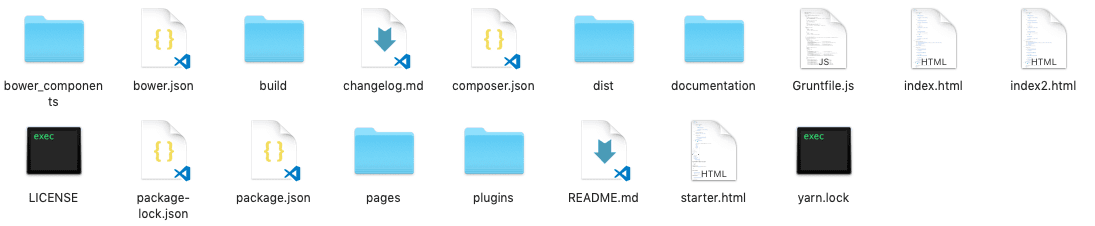
For keeping our project clean you need to copy & paste only these Folders “bower_components” & “dist” from here to the “wwwroot” folder of your project.
Now create a Controller as “HomeController.cs” inside your Controllers Folder & Add this code.
using Microsoft.AspNetCore;
using Microsoft.AspNetCore.Hosting;
using Microsoft.AspNetCore.Mvc;

namespace AdminPanelTutorial
{
    public class HomeController : Controller
    {
        public IActionResult Index()
        {
            return View();
        }
    }
}
Don’t forget to change the namespace according to your project name.
Creating a Layout Page
Creating a Layout page is always considered as a good coding practice. It will help to reuse the common Code of our Application, which will be required in every Page of our Application.
So, Create a new File as “_ViewStart.cshtml” Inside your “Views” Folder & Add this Code:
@{
    Layout = "~/Views/Shared/_Layout.cshtml";
}
Now Create a Folder “Shared” inside “Views” Folder & Inside “Shared” Folder Create two new Files as “_Layout.cshtml” & “_MainMenu.cshtml”
Put this Code Inside “Layout.cshtml”
<!DOCTYPE html>
<html>
<head>
  <meta charset="utf-8">
  <meta http-equiv="X-UA-Compatible" content="IE=edge">
  <title>Admin Panel</title>
  <!-- Tell the browser to be responsive to screen width -->
  <meta content="width=device-width, initial-scale=1, maximum-scale=1, user-scalable=no" name="viewport">
  <link rel="stylesheet" href="~/bower_components/bootstrap/dist/css/bootstrap.min.css">
  <!-- Font Awesome -->
  <link rel="stylesheet" href="~/bower_components/font-awesome/css/font-awesome.min.css">
  <!-- Ionicons -->
  <link rel="stylesheet" href="~/bower_components/Ionicons/css/ionicons.min.css">
  <!-- Theme style -->
  <link rel="stylesheet" href="~/dist/css/AdminLTE.min.css">
  <link rel="stylesheet" href="~/dist/css/skins/skin-blue.min.css">
<!-- jQuery 3 -->
<script src="~/bower_components/jquery/dist/jquery.min.js"></script>
  <!-- Google Font -->
  <link rel="stylesheet"
        href="https://fonts.googleapis.com/css?family=Source+Sans+Pro:300,400,600,700,300italic,400italic,600italic">
</head>
<body class="hold-transition skin-blue sidebar-mini">
<div class="wrapper">
  <!-- Main Header -->
  <header class="main-header">
    <!-- Logo -->
    <a href="index2.html" class="logo">
      <!-- mini logo for sidebar mini 50x50 pixels -->
      <span class="logo-mini"><b>AP</b>T</span>
      <!-- logo for regular state and mobile devices -->
      <span class="logo-lg"><b>AdminPanel</b>Tutorial</span>
    </a>
    <!-- Header Navbar -->
    <nav class="navbar navbar-static-top" role="navigation">
      <!-- Sidebar toggle button-->
      <a href="#" class="sidebar-toggle" data-toggle="push-menu" role="button">
        <span class="sr-only">Toggle navigation</span>
      </a>
      <!-- Navbar Right Menu -->
      <div class="navbar-custom-menu">
        <ul class="nav navbar-nav">
          <!-- User Account Menu -->
          <li class="dropdown user user-menu">
            <!-- Menu Toggle Button -->
            <a href="#" class="dropdown-toggle" data-toggle="dropdown">
              <!-- The user image in the navbar-->
              <img src="~/dist/img/user2-160x160.jpg" class="user-image" alt="User Image">
              <!-- hidden-xs hides the username on small devices so only the image appears. -->
              <span class="hidden-xs">Shehryar khan</span>
            </a>
            <ul class="dropdown-menu">
              <!-- The user image in the menu -->
              <li class="user-header">
                <img src="~/dist/img/user2-160x160.jpg" class="img-circle" alt="User Image">
                <p>
                  Shehryar khan - Coding Infinite
                  <small>Member since Nov. 2012</small>
                </p>
              </li>
              <!-- Menu Body -->
              <li class="user-body">
                <div class="row">
                  <div class="col-xs-4 text-center">
                    <a href="#">Account</a>
                  </div>
                </div>
                <!-- /.row -->
              </li>
              <!-- Menu Footer-->
              <li class="user-footer">
                <div class="pull-left">
                  <a href="#" class="btn btn-default btn-flat">Profile</a>
                </div>
                <div class="pull-right">
                  <a href="#" class="btn btn-default btn-flat">Sign out</a>
                </div>
              </li>
            </ul>
          </li>
        </ul>
      </div>
    </nav>
  </header>
  <!-- Left side column. contains the logo and sidebar -->
  <aside class="main-sidebar">
    <!-- sidebar: style can be found in sidebar.less -->
    <section class="sidebar">
      <!-- Sidebar user panel (optional) -->
      <div class="user-panel">
        <div class="pull-left image">
          <img src="~/dist/img/user2-160x160.jpg" class="img-circle" alt="User Image">
        </div>
        <div class="pull-left info">
          <p>Shehryar Khan</p>
          <!-- Status -->
          <a href="#"><i class="fa fa-circle text-success"></i> Online</a>
        </div>
      </div>
      <!-- search form (Optional) -->
      <form action="#" method="get" class="sidebar-form">
        <div class="input-group">
          <input type="text" name="q" class="form-control" placeholder="Search...">
          <span class="input-group-btn">
              <button type="submit" name="search" id="search-btn" class="btn btn-flat"><i class="fa fa-search"></i>
              </button>
            </span>
        </div>
      </form>
      <!-- /.search form -->
      <!-- Sidebar Menu -->
      @Html.Partial("_MainMenu")
      <!-- /.sidebar-menu -->
    </section>
    <!-- /.sidebar -->
  </aside>
  <!-- Content Wrapper. Contains page content -->
  <div class="content-wrapper">
    <!-- Content Header (Page header) -->
    @RenderBody()
    <!-- /.content -->
  </div>
  <!-- /.content-wrapper -->
  <!-- Main Footer -->
  <footer class="main-footer">
    <!-- Default to the left -->
    <strong>Copyright © 2018 <a href="https://codinginfinite.com">CodingInfinite</a>.</strong> All rights reserved.
  </footer>
</div>
<!-- ./wrapper -->
<!-- REQUIRED JS SCRIPTS -->
<!-- Bootstrap 3.3.7 -->
<script src="~/bower_components/bootstrap/dist/js/bootstrap.min.js"></script>
<!-- AdminLTE App -->
<script src="~/dist/js/adminlte.min.js"></script>
</body>
</html>
& Copy the code below inside your “_MainMenu.cshtml”
<ul class="sidebar-menu" data-widget="tree">
<li class="header">HEADER</li>
<!-- Optionally, you can add icons to the links -->
<li class="active"><a href="#"><i class="fa fa-link"></i> <span>Link</span></a></li>
<li><a href="#"><i class="fa fa-link"></i> <span>Another Link</span></a></li>
<li class="treeview">
    <a href="#"><i class="fa fa-link"></i> <span>Multilevel</span>
    <span class="pull-right-container">
        <i class="fa fa-angle-left pull-right"></i>
        </span>
    </a>
    <ul class="treeview-menu">
    <li><a href="#">Link in level 2</a></li>
    <li><a href="#">Link in level 2</a></li>
    </ul>
</li>
</ul>
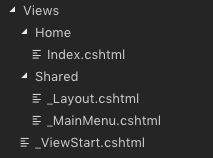
Now create a new Folder to Views as “Home” & inside this Folder create a file as “Index.cshtml”
Now your “Views” directory structure will be looking something like this
Now add this code to your “Index.cshtml” file
<section class="content-header">
    <h1>
    Home
    <small>Optional description</small>
    </h1>
</section>
<!-- Main content -->
<section class="content container-fluid">
    <!--------------------------
    | Your Page Content Here |
    -------------------------->
</section>
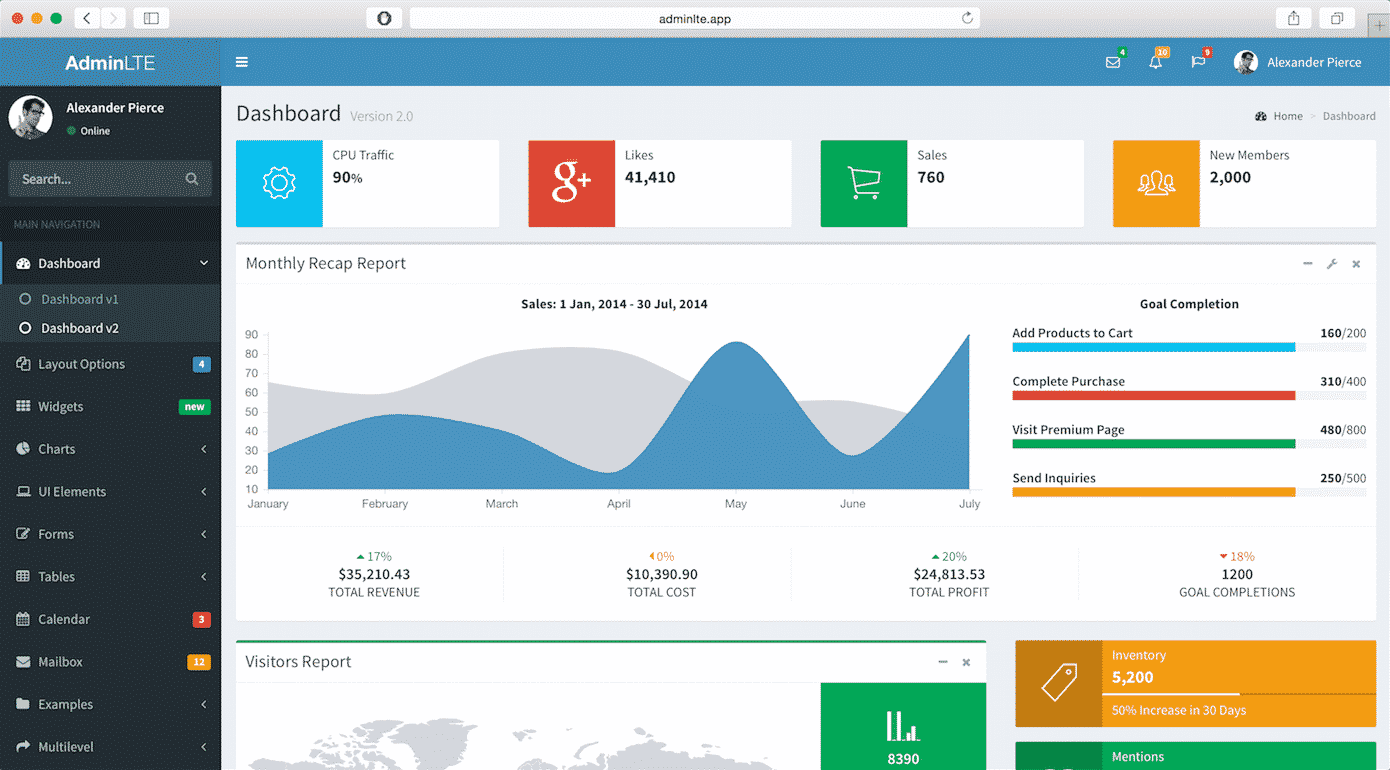
Run your project. You’ll see this page
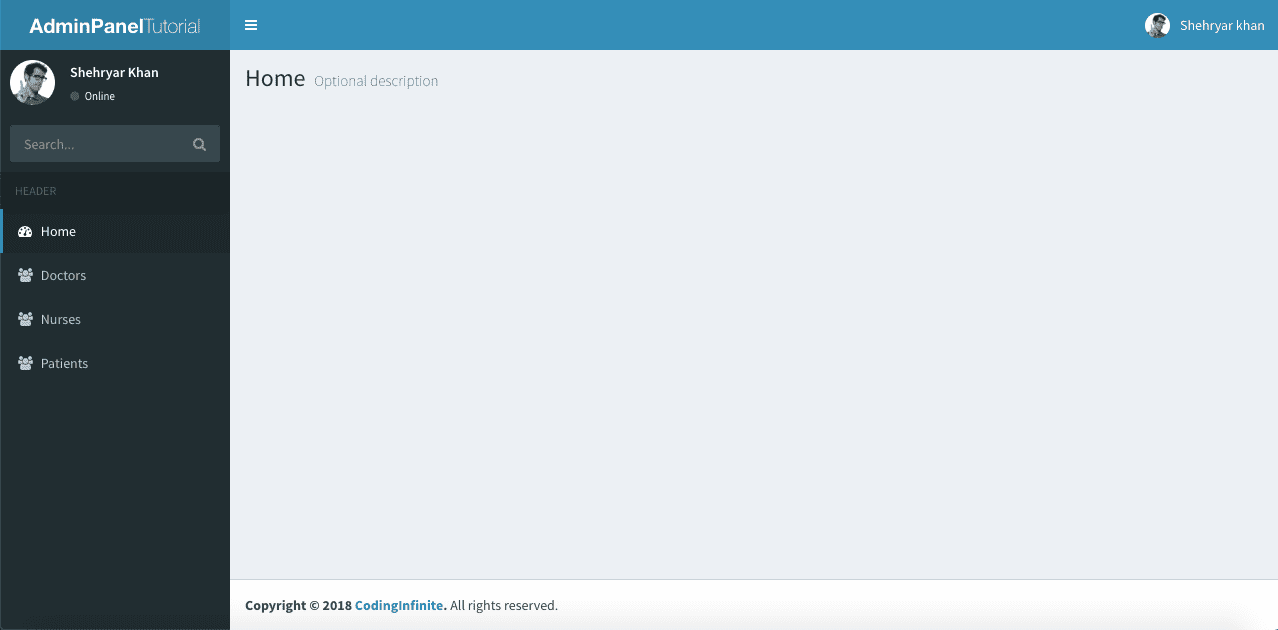
Now your Starter Page is ready. You can also download the Complete Source Code from Github.
If you find any problem, please share in the comment section below.
In the next part of this tutorial, we’ll create a login page for our Admin Panel. Although AdminLTE provides a sample login page but we’ll use the more beautiful design for our login page.


Best Developer
Dear Shehryar Khan,
Please I really like your tutorial and will need your assistance.
Can we chat privately through email or phone?
Email: [email protected]
Contact: +233245191369
I’ve an error after adding AdminLTE files:
in fullcalendar.d.ts cannot find ‘JQueryPromise’
cannot find ‘JQueryEventObject’
cannot find ‘JQueryAjaxSettings’
cannot find ‘moment’
Source Code Uploaded at Github -> https://github.com/CodingInfinite/Asp-net-Core-Project-with-Admin-Template-Setup
Thanks!
But it doesn’t work for me.
Is there a downlaod link, please?
Source Code Uploaded at Github -> https://github.com/CodingInfinite/Asp-net-Core-Project-with-Admin-Template-Setup
Thanks! Very helpful.