Mlflow Tutorial With Code Example
Building a machine learning model with the best performance can take a lot of time and effort. Generally, we create different files for running the models with different hyper-parameters to obtain different results. Due to this, the task becomes cumbersome and disorganized. However, you can use mlflow to manage the entire machine learning cycle. In this mlflow tutorial, we will introduce you to the basics of mlflow with an example.
What is MLflow?
MLflow is an open-source software tool for managing the machine learning lifecycle. It has been developed by Databricks.
MLflow helps you train and run the machine learning model with different hyperparameters for each run.
After running the machine learning models, mlflow saves the hyperparameters, the trained model, the dataset, etc. Later, you can compare all the runs to identify the best execution.
MLflow also provides various other services. For each task group, there are dedicated mlflow components as discussed below.
Benefits of MLflow
Using mlflow helps us gain many benefits in the entire machine learning lifecycle.
- Mlflow helps in experiment tracking. While developing a machine learning model, you might change the hyperparameters, training dataset, or machine learning technique itself. This will lead to different outputs from the machine learning models.
- With mlflow, you can store the hyperparameters, training dataset, trained machine learning model, outputs, and other metrics from the program.
- If you are running mlflow on a shared machine, you can also securely share, manage, and compare the results from the programs by different users. You can also share all the output files and code versions with all the developers using mlflow.
- MLflow facilitates model management. With this, you can use a central place to discover and share machine learning models and collaborate with different users. You can also move a machine learning model from experimentation to testing and production.
- MLflow helps you deploy machine learning models into production using built-in integration with Docker containers, Azure ML, or Amazon Sagemaker. In short, mlflow can make entire machine learning lifecycle management a cakewalk.
MLflow Components
MLflow has four components namely mlflow tracking, mlflow models, mlflow project, and mlflow model registry. Let us discuss each component one by one.
MLflow Tracking
MLflow tracking is used to track and record different runs of the machine learning program. In mlflow tracking, we run the program and store hyperparameters and metrics of the model. After storing the results, we can visualize the results of each run using the GUI interface of the mlflow server. Some of the features of mlflow tracking are as follows.
- It automatically logs parameters , code versions, artifacts, and metrics for each run. You can use mlflow with different programming languages like Python, R, Scala, and Java using its APIs.
- With mlflow tracking, you can create, organize, and visualize different runs of the code and their output using access control and search queries.
- You can automatically track runs from Jupyter notebooks or other IDEs. MLflow tracking stores the code for each run. You can always go back to any previous version of code.
- In addition to the code, you can store parameters, datasets, metrics, binary files, etc into your local filesystem. You can also store the data in an SQLAlchemy database or to a tracking server.
- MLflow tracking also provides delta lake integration. With this, you can track large-scale datasets that are used in training the machine learning models using delta lake snapshots.
- You can also keep track of different files such as S3 buckets, models in amazon S3, local file paths, google cloud storage, SFTP server, shared NFS file system, Azure blob storage, etc using mlflow tracking.
MLflow Projects
MLflow projects is used to package the code of the machine learning program so that we can reuse and reproduce the code later easily. It provides a packaging format for reproducible runs on any given machine.
- With mlflow projects, you can also specify the software environment in which your code is being executed. MLflow supports conda, jupyter notebook, docker container, and system environment. You can use a Git repository or a local directory as a mlflow project.
- In managed mlflow environment, you can also run mlflow projects from Git or local file system remotely on Databricks clusters using Databricks command line interface.
MLflow Models
MLflow models component is used to package trained machine learning models. It provides a standard format for packaging machine learning models that can be used on different platforms.
- MLflow models component provides standard flavors like different python modules and frameworks and R functions that can be used while creating machine learning applications.
- You can also use custom python modules for model customization which is not explicitly supported by MLflow’s built-in flavors.
- MLflow models component provides built-in deployment tools. You can quickly deploy your machine learning application on a local machine or other production environments such as Amazon Sagemaker, Microsoft Azure ML, Docker, etc.
MLflow Model Registry
MLflow model registry is used to add the model to the model registry. It helps us store and track the machine learning model from experimentation to deployment. With the mlflow model registry, we can also add descriptions to the models using various functions and methods.
- MLflow model registry provides a central repository. You can register machine learning models that have a unique name, version, and other metadata in the central repository using the mlflow model registry.
- You can also keep track of the version of registered models when they are updated using model versioning. Additionally, you can assign custom stages to each model version to represent the lifecycle of a machine learning model.
- MLflow model registry also provides workflow integration. You can record stage transitions, request changes, and review and approve the changes for better control and governance.
- With the mlflow model registry, you can also record new registration events and changes in the form of activities. The activities automatically log users, changes, and any additional metadata.
MLflow Installation
- If you use PIP, you can install mlflow using the command
“pip install mlflow”. In Python3, you can use the command“pip3 install mlflow”.
- In the conda environment, you can execute the command
“conda install mlflow”to install mlflow in your environment.
MLflow Tutorial With Code Example
In this article on k-means clustering using sklearn, we discussed the silhouette score approach to find the optimal number of clusters in a k-means clustering example. In the article, we used a python dictionary to store the number of clusters and the associated silhouette score.
Now, we will use mlflow to save the silhouette score, associated value of k, the binary file for trained machine learning models with each k, and other metadata. For this, we will use the following steps.
- First, we will create an experiment with a given name. For this, we will use the
create_experiment()function. Thecreate_experiment()function takes a string as its input argument to the name parameter and returns an experiment id. - Remember that we can create only one experiment with a single name. Hence, if there exists an experiment with the same name given to the
create_experiment()function, the program will run into an error. To avoid this error, we can use theget_experiment_by_name()function to get the id of the experiment. - The
get_experiment_by_name()function takes the string name as its input argument and returns an experiment object. You can get the experiment id using theexperiment_idattribute. - To successfully get the experiment id using the
create_experiment()function and theget_experiment_by_name()function without running into an error, we will use a python try-except block. In the try block, we will execute thecreate_experiment()function. If it runs successfully, we will get the experiment id. If the program raises an exception we will catch it using an except block. In the except block, we will use theget_experiment_by_name()to get the experiment id.
After getting the experiment id, we will start the experiment to find the optimal number of clusters. For this, we will create a list of numbers from 2 to 5. The numbers denote the number of clusters.
For each number in the list, we will run the code to calculate the silhouette score.
For each run, we will first create a run context using the start_run() function. The start_run() function takes the experiment id in its experiment_id parameter. While creating the run context, a directory is also created in the current experiment’s folder. The run id of the current run is assigned as the name of the directory.
After creating the run context, we will calculate the silhouette score as we did in the article on k-means clustering implementation. After calculating the silhouette score, we need to save the results for the current run. For this, we will use the following steps.
- The number of clusters works as a parameter to the current run. Therefore, we will store the number of clusters as a parameter. For this, we will use the
log_param()function. Thelog_param()function takes the name of the parameter as its first input argument and the parameter value as its second input argument. After execution, it saves the value in the directory namedparamsinside the current run folder. The name of the file containing the parameter is the same as the name given to thelog_param()function. - The silhouette score is the metric we are calculating. Therefore, we will store it as a metric. For this, we will use the
log_metric()function. Thelog_metric()takes the name of the metric as its first input argument and the metric value as its second input argument. After execution, it saves the value in the directory named metrics inside the current run folder. The name of the file containing the metric value is the same as the name given to thelog_metric()function. - After saving the metric, we will save the model using the
log_model()function. Thelog_model()takes the name of the model as its first input argument and the model object as its second input argument. After execution, it saves the pickle file of the model in a directory with the same name that we pass to thelog_model()function. This folder is stored inside the artifacts folder in the current run directory. Along with the pickle file, thelog_model()function also saves other metadata inside the different text and YAML files. - After saving the model, you can end the current run using the
end_run()function.
After executing the above steps, we will all the required files will be saved to our file system. Following is the entire python script for executing the entire mlflow tutorial.
#import required modules
import mlflow
from sklearn.metrics import silhouette_score
from sklearn.cluster import KMeans
#create dataset
training_data=[(2,10),(2,6),(11,11),(6,9),(6,4),(1,2),(5,10),(4,9),(10,12),(7,5),(9,11),(4,6),(3,10),(3,8),(6,11)]
#create a new experiment
experiment_name = 'ClusteringWithMlflow'
try:
    exp_id = mlflow.create_experiment(name=experiment_name)
except Exception as e:
    exp_id = mlflow.get_experiment_by_name(experiment_name).experiment_id
#run the code for different number of clusters
range_of_k = range(2,6)
for k in range_of_k :
    with mlflow.start_run(experiment_id=exp_id):
        untrained_model = KMeans(n_clusters=k)
        trained_model=untrained_model.fit(training_data)
        cluster_labels = trained_model.labels_
        score=silhouette_score(training_data, cluster_labels)
        #save parameter
        mlflow.log_param('value_of_k', k)
        #save metric
        mlflow.log_metric('silhoutte_score', score)
        #save model
        mlflow.sklearn.log_model(trained_model, "Clustering_Model")
        #end current run
        mlflow.end_run()
I have attached the Jupyter notebook for the source code at the end of this article.
How to Access The Output of The MLflow Example?
After running the code given in the above mlflow tutorial, the outputs will be saved inside the mlruns directory. The mlruns directory will be stored in the same directory as the source code file of the mlflow tutorial. We have executed the code in the “MLflow experiment.ipynb” file that is located in the codes folder. Hence, the mlruns folder will also be present in the same directory as shown below.

Inside the mlruns directory, you will find a folder for each experiment id as shown below.
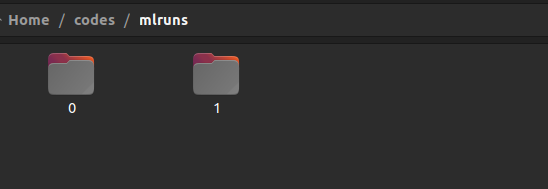
In the above image, the experiment id 0 is used for default experiment. It has no significant data inside it.
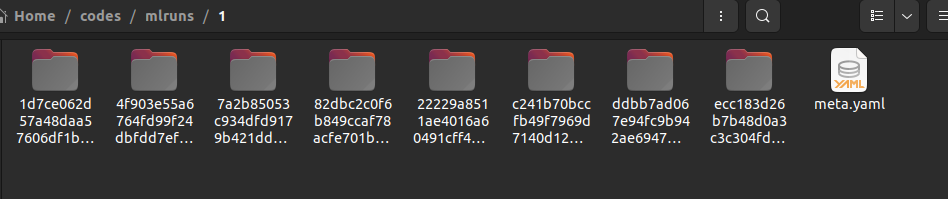
Inside the folder of each experiment id, you will find a folder for each run. The folder name consists of the run id. You will also find a YAML file containing the metadata as shown below.
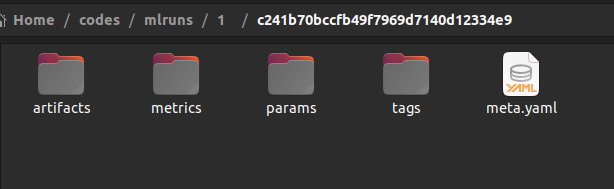
Inside the folder for each run id, you will find folders named artifacts, metrics, params, and tags. You will also find a YAML file containing the metadata as shown below.
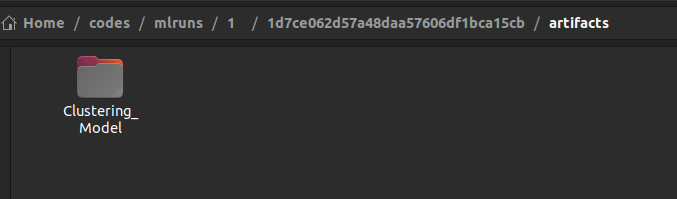
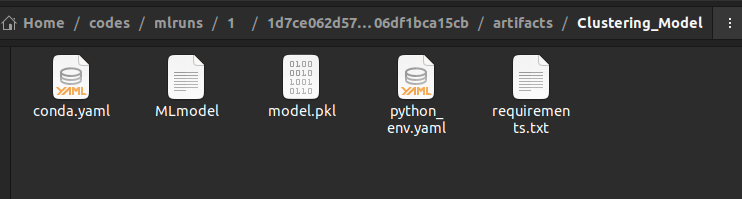
Inside the artifacts folder, you will find a folder with the name passed to the log_model() function as shown below.
Inside the above folder, you will find the pickle file of the machine learning model, YAML files containing descriptions of channels, dependencies, and the environment.
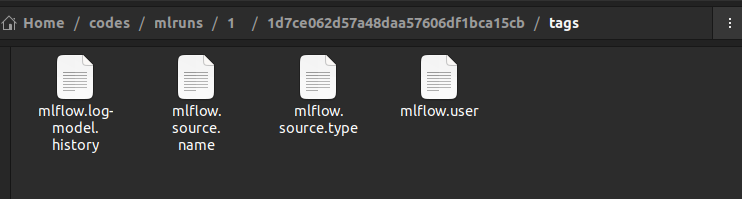
The tags folder contains various text files having user details, source details, the source name, the model history, etc.
The metrics and params folder in the run directory contain files having values of metrics and parameters respectively.
MLflow GUI to Access the Output of the Tutorial
Accessing the output of the mlflow tutorial in the file system is a cumbersome task. You can use the mlflow GUI to access the results. For this, we need to follow the below steps.
We will go to the directory containing the mlruns folder and the source code of our mlflow tutorial. Here, we will open the command line terminal window. In the command line interface, we will execute the command “mlflow ui” as shown below.
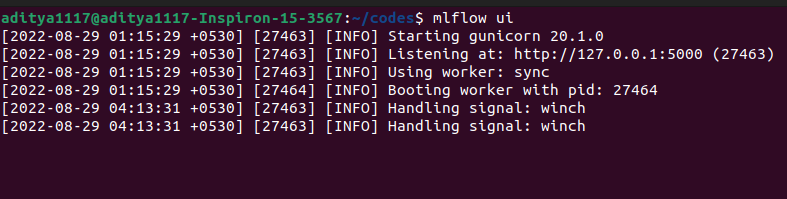
Here, we have executed the mlflow ui command in the same directory where the source code and the mlruns directory is present.
As you can see in the above screenshot, the mlflow server with GUI has been launched at port number 5000 on the localhost address. Hence, we will open the address “http://127.0.0.1:5000” or “http://localhost:5000/” in a browser window. In the browser window, the default window will open as shown below.
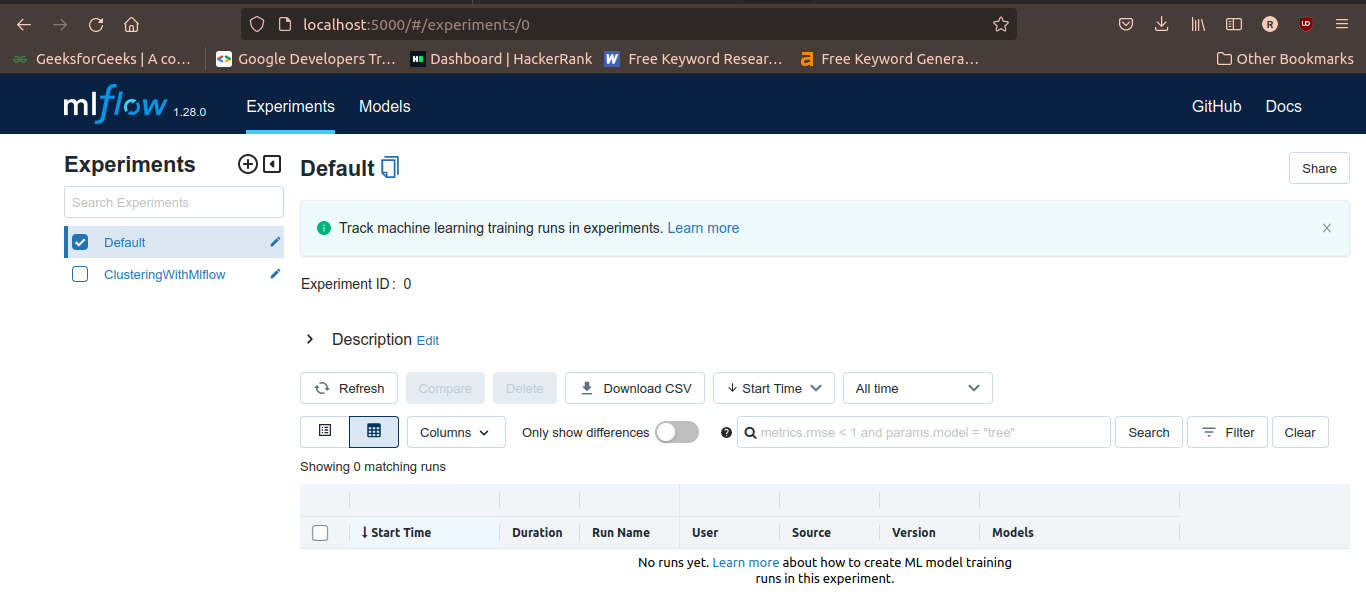
In the left-upper corner, you will see the experiment name.
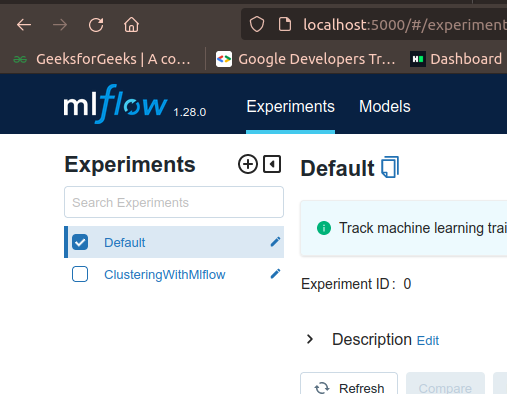
To observe the results of the experiment associated with a given experiment name, you need to check the checkbox in front of the experiment name. After selecting the experiment name, you will get a table of all the runs in the experiment with their corresponding start times, duration of execution, user, source, models, metrics, parameters, etc as shown in the following figure.
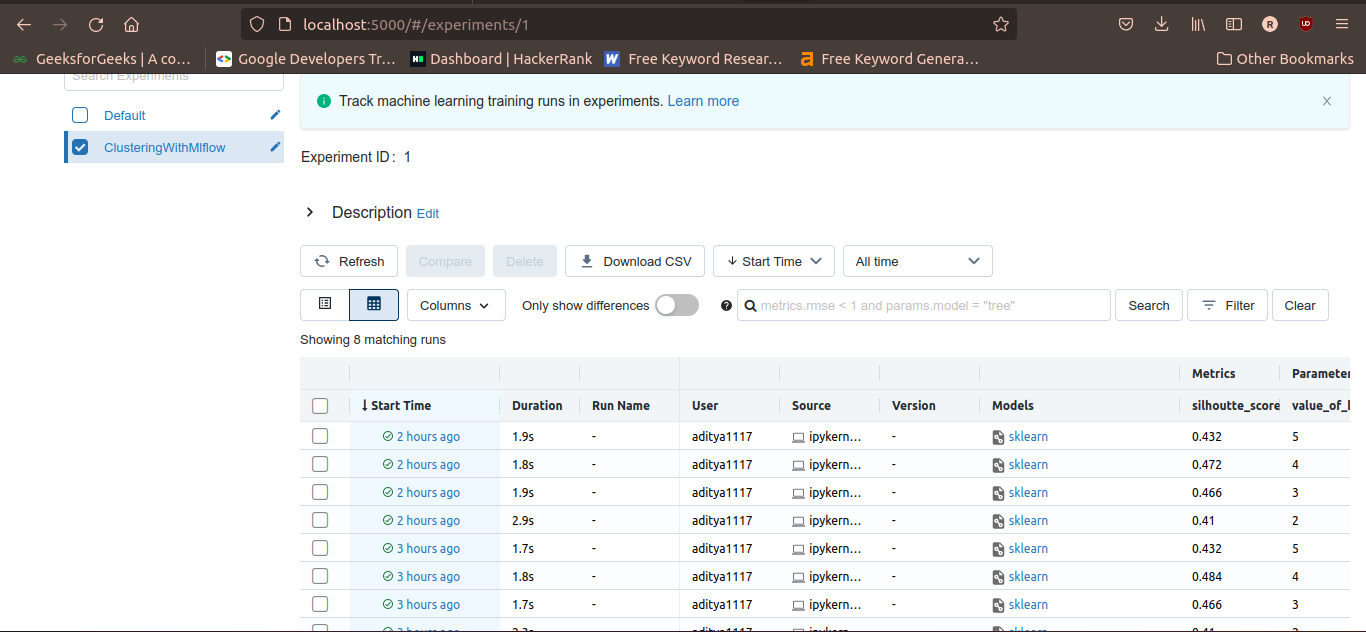
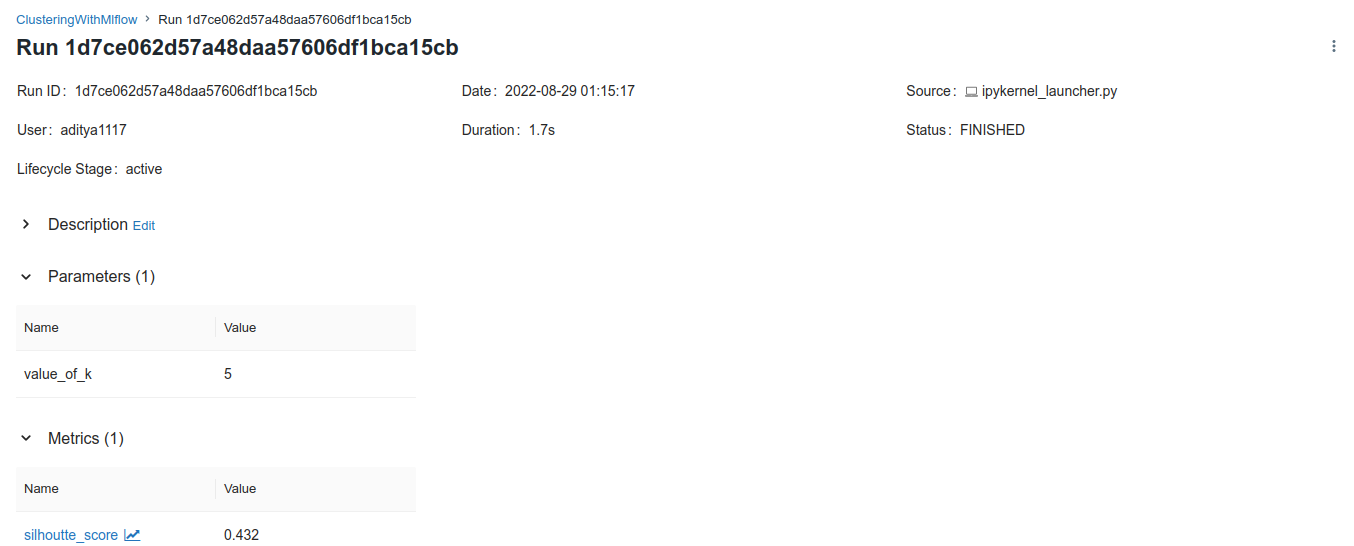
You can select a run by clicking on the start time. This will expand the details of the selected run as shown below.
Conclusion
In this article, we have discussed the machine learning life cycle management tool named mlflow. In this mlflow tutorial, we discussed the benefits of mlflow and its components along with a code example. You can use mlflow to manage the lifecycle of the machine learning model very easily. This was just an introduction to mlflow and we will publish new tutorials containing the implementation of different components of mlflow in the coming weeks. So, stay tuned.
To learn more about machine learning, you can read this article on regression in machine learning. You might also like this article on machine learning tools.
To read about other computer science topics, you can read this article on dynamic role-based authorization using ASP.net. You can also read this article on user activity logging using Asp.net.
Jupyter notebook for the source code of mlflow tutorial.