Signup Login page in PHP with Database MySQL Source Code
I have also written step by step Tutorial for Restful Web Services in PHP Example – PHP + MySQL Best Practice. Today I’m going to connect login & Signup Webservices using Login & Signup HTML page. You can use any HTML page, I’m using This because it has a really beautiful design and has Form for both Login & Signup.
What we’ll cover in Signup Login page in PHP with Database
- File Structure
- Creating HTML page
- Connecting HTML page with Webservices
File Structure
We’ll use this folders & files structure inside our “app” folder for our Login & Signup page.
index.html
|
assets
├─── css
├────── style.css
api
├─── config/
├────── database.php – file used for connecting to the database.
├─── objects/
├────── user.php – contains properties and methods for “user” database queries.
├─── User/
├────── signup.php – file that will accept user data to be saved to the DB.
├────── login.php – file that will accept username & password and validate
as you can see that we have added pages and assets folders, pages folder will contain all HTML pages and assets folder is for CSS, JS, images etc.
Creating HTML page
as I stated that you can create your own design or you can use any other design, for this tutorial I’m using This template and I just modified it according to my Webservices.
inside your “app” folder, create a new file as “index.html” and paste this code there
<!DOCTYPE html>
<html lang="en" >

<head>
  <meta charset="UTF-8">
  <title>PHP Learning</title>


  <link rel='stylesheet prefetch' href='https://fonts.googleapis.com/css?family=Open+Sans:600'>

      <link rel="stylesheet" href="./assets/css/style.css">


</head>

<body>

  <div class="login-wrap">
  <div class="login-html">
    <input id="tab-1" type="radio" name="tab" class="sign-in" checked><label for="tab-1" class="tab">Sign In</label>
    <input id="tab-2" type="radio" name="tab" class="sign-up"><label for="tab-2" class="tab">Sign Up</label>
    <div class="login-form">
      <form class="sign-in-htm" action="./api/user/login.php" method="GET">
        <div class="group">
          <label for="user" class="label">Username</label>
          <input id="username" name="username" type="text" class="input">
        </div>
        <div class="group">
          <label for="pass" class="label">Password</label>
          <input id="password" name="password" type="password" class="input" data-type="password">
        </div>
        <div class="group">
          <input id="check" type="checkbox" class="check" checked>
          <label for="check"><span class="icon"></span> Keep me Signed in</label>
        </div>
        <div class="group">
          <input type="submit" class="button" value="Sign In">
        </div>
        <div class="hr"></div>
        <div class="foot-lnk">
          <a href="#forgot">Forgot Password?</a>
        </div>
      </form>
      <form class="sign-up-htm" action="./api/user/signup.php" method="POST">
        <div class="group">
          <label for="user" class="label">Username</label>
          <input id="username" name="username" type="text" class="input">
        </div>
        <div class="group">
          <label for="pass" class="label">Password</label>
          <input id="password" name="password" type="password" class="input" data-type="password">
        </div>
        <div class="group">
          <label for="pass" class="label">Confirm Password</label>
          <input id="pass" type="password" class="input" data-type="password">
        </div>
        <div class="group">
          <input type="submit" class="button" value="Sign Up">
        </div>
        <div class="hr"></div>
        <div class="foot-lnk">
          <label for="tab-1">Already Member?</a>
        </div>
      </form>
    </div>
  </div>
</div>


</body>

</html>
Now go to the “assets” folder and create a new folder as “css” and create a new file there as “style.css” and paste this code there
body{
  margin:0;
  color:#6a6f8c;
  background:#c8c8c8;
  font:600 16px/18px 'Open Sans',sans-serif;
}
*,:after,:before{box-sizing:border-box}
.clearfix:after,.clearfix:before{content:'';display:table}
.clearfix:after{clear:both;display:block}
a{color:inherit;text-decoration:none}

.login-wrap{
  width:100%;
  margin:auto;
  margin-top: 30px;
  max-width:525px;
  min-height:570px;
  position:relative;
  background:url(http://codinginfinite.com/demo/images/bg.jpg) no-repeat center;
  box-shadow:0 12px 15px 0 rgba(0,0,0,.24),0 17px 50px 0 rgba(0,0,0,.19);
}
.login-html{
  width:100%;
  height:100%;
  position:absolute;
  padding:90px 70px 50px 70px;
  background:rgba(40,57,101,.9);
}
.login-html .sign-in-htm,
.login-html .sign-up-htm{
  top:0;
  left:0;
  right:0;
  bottom:0;
  position:absolute;
  -webkit-transform:rotateY(180deg);
          transform:rotateY(180deg);
  -webkit-backface-visibility:hidden;
          backface-visibility:hidden;
  transition:all .4s linear;
}
.login-html .sign-in,
.login-html .sign-up,
.login-form .group .check{
  display:none;
}
.login-html .tab,
.login-form .group .label,
.login-form .group .button{
  text-transform:uppercase;
}
.login-html .tab{
  font-size:22px;
  margin-right:15px;
  padding-bottom:5px;
  margin:0 15px 10px 0;
  display:inline-block;
  border-bottom:2px solid transparent;
}
.login-html .sign-in:checked + .tab,
.login-html .sign-up:checked + .tab{
  color:#fff;
  border-color:#1161ee;
}
.login-form{
  min-height:345px;
  position:relative;
  -webkit-perspective:1000px;
          perspective:1000px;
  -webkit-transform-style:preserve-3d;
          transform-style:preserve-3d;
}
.login-form .group{
  margin-bottom:15px;
}
.login-form .group .label,
.login-form .group .input,
.login-form .group .button{
  width:100%;
  color:#fff;
  display:block;
}
.login-form .group .input,
.login-form .group .button{
  border:none;
  padding:15px 20px;
  border-radius:25px;
  background:rgba(255,255,255,.1);
}
.login-form .group input[data-type="password"]{
  text-security:circle;
  -webkit-text-security:circle;
}
.login-form .group .label{
  color:#aaa;
  font-size:12px;
}
.login-form .group .button{
  background:#1161ee;
}
.login-form .group label .icon{
  width:15px;
  height:15px;
  border-radius:2px;
  position:relative;
  display:inline-block;
  background:rgba(255,255,255,.1);
}
.login-form .group label .icon:before,
.login-form .group label .icon:after{
  content:'';
  width:10px;
  height:2px;
  background:#fff;
  position:absolute;
  transition:all .2s ease-in-out 0s;
}
.login-form .group label .icon:before{
  left:3px;
  width:5px;
  bottom:6px;
  -webkit-transform:scale(0) rotate(0);
          transform:scale(0) rotate(0);
}
.login-form .group label .icon:after{
  top:6px;
  right:0;
  -webkit-transform:scale(0) rotate(0);
          transform:scale(0) rotate(0);
}
.login-form .group .check:checked + label{
  color:#fff;
}
.login-form .group .check:checked + label .icon{
  background:#1161ee;
}
.login-form .group .check:checked + label .icon:before{
  -webkit-transform:scale(1) rotate(45deg);
          transform:scale(1) rotate(45deg);
}
.login-form .group .check:checked + label .icon:after{
  -webkit-transform:scale(1) rotate(-45deg);
          transform:scale(1) rotate(-45deg);
}
.login-html .sign-in:checked + .tab + .sign-up + .tab + .login-form .sign-in-htm{
  -webkit-transform:rotate(0);
          transform:rotate(0);
}
.login-html .sign-up:checked + .tab + .login-form .sign-up-htm{
  -webkit-transform:rotate(0);
          transform:rotate(0);
}

.hr{
  height:2px;
  margin:60px 0 50px 0;
  background:rgba(255,255,255,.2);
}
.foot-lnk{
  text-align:center;
}
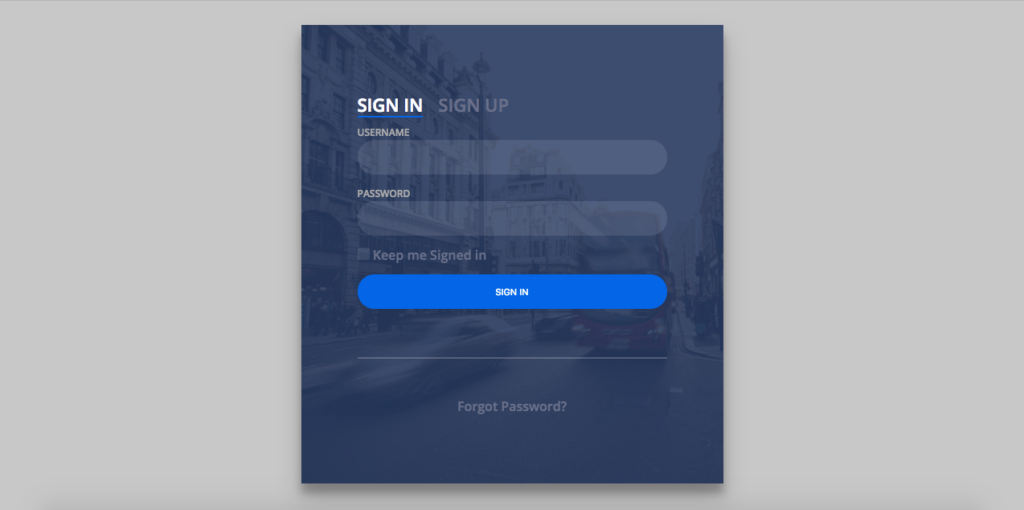
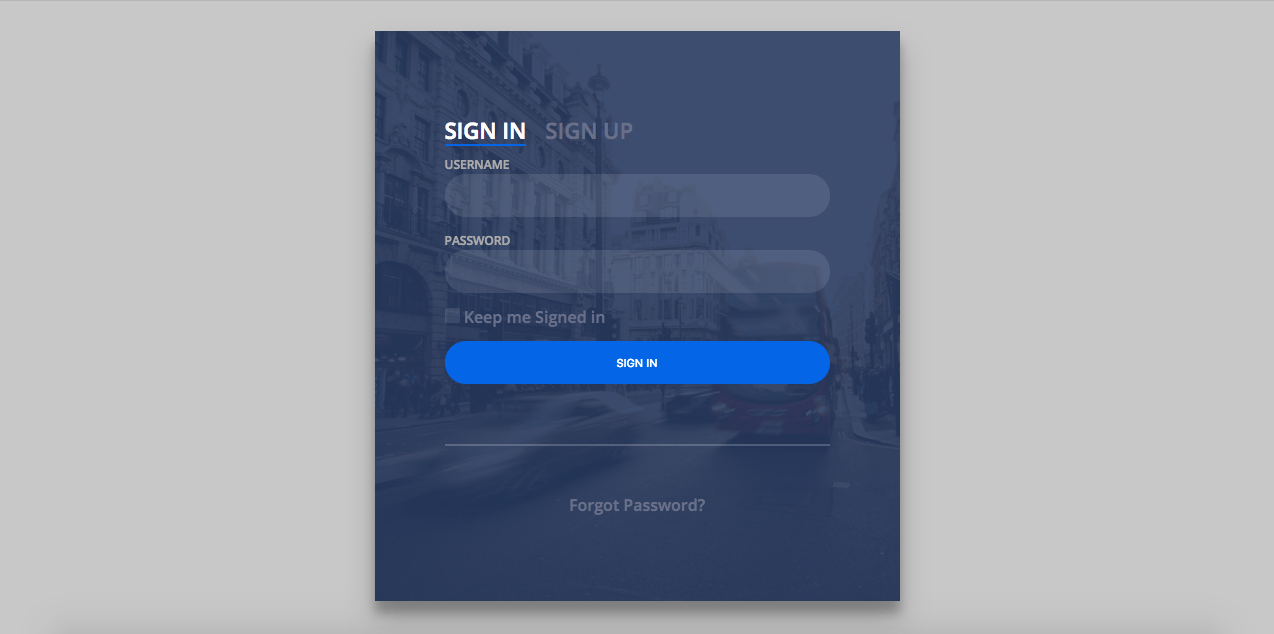
Now you’ll see the page same as this

Connecting HTML page with Webservices
Download Login & Signup API from Github you can also create these API following my previous post, Restful Web Services in PHP Example – PHP + MySQL Best Practice
setup Database and paste “api” folder inside “app” folder.
all done, Now you can run your index.html through localhost.
You might be Interested in:
Here are some more Tutorial for creating Web Application & CRUD Operations using PHP & MySQL.


Shehryar,
Fantastic tutorial!! I am receiving the following API error message:
__________________
Not Found
The requested URL /app/.api/user/login.php was not found on this server.
Additionally, a 404 Not Found error was encountered while trying to use an ErrorDocument to handle the request.
It must be on my end. I think that I have followed the steps correctly.
Perhaps it is located in the wrong folder?
you have a dot(.) in your URL before api.
Please remove the dot and try.
Shehyar,
Thank you!
I will try this and let you know.
MLM
Shehyar,
I removed the . period but still receive the following message (below).
Is the problem perhaps the naming structure – for example a have a main index.html on the homepage then subfolder app, which in turn contains the index.html file, the assets folder and api folder – i.e. is the issue that I have two index.html files even though they are in separate locations?
My structure looks like this:
Main Site:
Index.html
About.html
Pillars.html
assets
|
app
|
index.html (the file structure that is the subject of this course)
|
assets (the files that are a part of the course)
api
___________________
Not Found
The requested URL /app/api/user/signup.php was not found on this server.
Additionally, a 404 Not Found error was encountered while trying to use an ErrorDocument to handle the request.
& Thank you for your comments this far
One other point of clarification is that the url for my database is not running off the url that you provided below
localhost/api/users/login.php?username=shehryar&password=12345
It is running to another location.
zip & email me your project at [email protected]
I’ll have a look why you’re getting this problem.
Was able to get it to work – Thank you very much for your assistance – Get tutorial and excellent work on your part
hi Sir I from myanmar. I want miniproject source code with php mysql.If you ok
help me
Hi,
How may I help you?
hi..pls explain following steps in clear
assets
├─── css
├────── style.css
api
├─── config/
├────── database.php – file used for connecting to the database.
├─── objects/
├────── user.php – contains properties and methods for “user” database queries.
├─── User/
├────── signup.php – file that will accept user data to be saved to the DB.
├────── login.php – file that will accept username & password and validate
i can’t able to understand the asset config objects folder?shall i want to create this folder or is it already exists??
The structure is to organize your project files.
All your static files must be in a separate folder so I named it as “Assets”. You may use the name of your choice.
Same is the case with Config Folder.
hi, I am creating a cinema booking system for my final year project and I am trying to incorporate this into my project however I have been unable to get it to work, is there any way you would be bale to help me?
many thanks
Am here for for the same reason bruh “online shopping system ” though, Hit me up in instagram @kiddowhy. lets help each other.
please i need a help. i want to create a login form username and password where users can create there username and password to login to a page
Please follow the above Article.