Signup Login page in PHP with Database MySQL Source Code
I have also written step by step Tutorial for Restful Web Services in PHP Example – PHP + MySQL Best Practice. Today I’m going to connect login & Signup Webservices using Login & Signup HTML page. You can use any HTML page, I’m using This because it has a really beautiful design and has Form for both Login & Signup.
What we’ll cover in Signup Login page in PHP with Database
- File Structure
- Creating HTML page
- Connecting HTML page with Webservices
File Structure
We’ll use this folders & files structure inside our “app” folder for our Login & Signup page.
index.html
|
assets
├─── css
├────── style.css
api
├─── config/
├────── database.php – file used for connecting to the database.
├─── objects/
├────── user.php – contains properties and methods for “user” database queries.
├─── User/
├────── signup.php – file that will accept user data to be saved to the DB.
├────── login.php – file that will accept username & password and validate
as you can see that we have added pages and assets folders, pages folder will contain all HTML pages and assets folder is for CSS, JS, images etc.
Creating HTML page
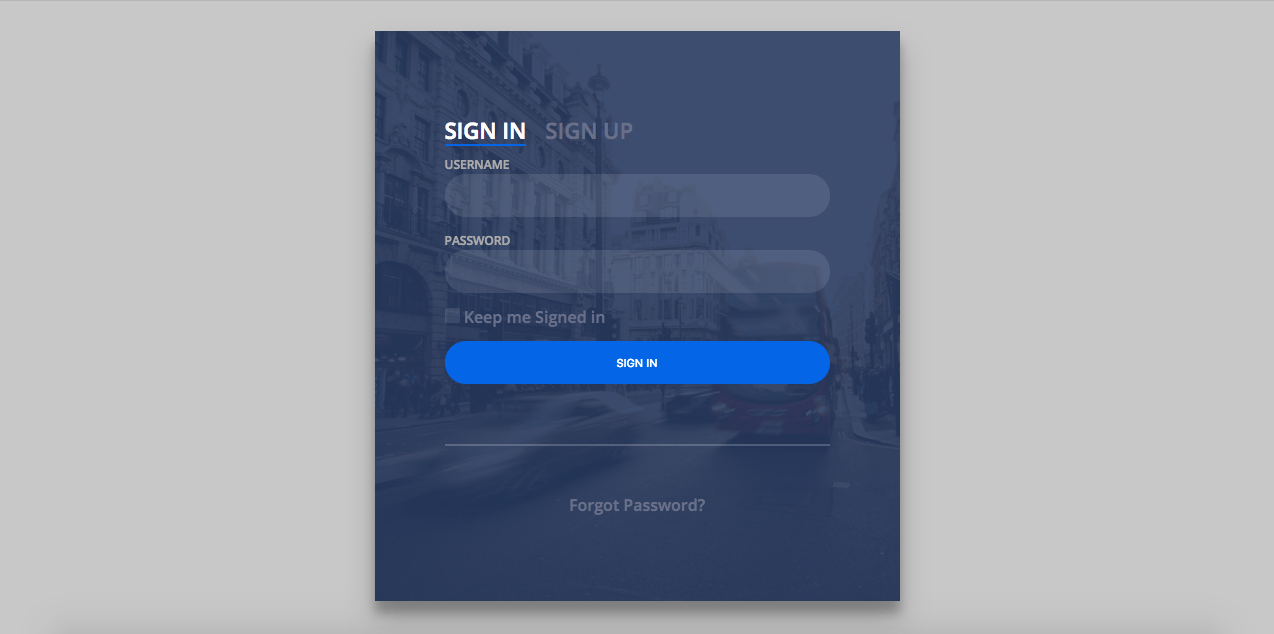
as I stated that you can create your own design or you can use any other design, for this tutorial I’m using This template and I just modified it according to my Webservices.
inside your “app” folder, create a new file as “index.html” and paste this code there
<!DOCTYPE html>
<html lang="en" >

<head>
  <meta charset="UTF-8">
  <title>PHP Learning</title>


  <link rel='stylesheet prefetch' href='https://fonts.googleapis.com/css?family=Open+Sans:600'>

      <link rel="stylesheet" href="./assets/css/style.css">


</head>

<body>

  <div class="login-wrap">
  <div class="login-html">
    <input id="tab-1" type="radio" name="tab" class="sign-in" checked><label for="tab-1" class="tab">Sign In</label>
    <input id="tab-2" type="radio" name="tab" class="sign-up"><label for="tab-2" class="tab">Sign Up</label>
    <div class="login-form">
      <form class="sign-in-htm" action="./api/user/login.php" method="GET">
        <div class="group">
          <label for="user" class="label">Username</label>
          <input id="username" name="username" type="text" class="input">
        </div>
        <div class="group">
          <label for="pass" class="label">Password</label>
          <input id="password" name="password" type="password" class="input" data-type="password">
        </div>
        <div class="group">
          <input id="check" type="checkbox" class="check" checked>
          <label for="check"><span class="icon"></span> Keep me Signed in</label>
        </div>
        <div class="group">
          <input type="submit" class="button" value="Sign In">
        </div>
        <div class="hr"></div>
        <div class="foot-lnk">
          <a href="#forgot">Forgot Password?</a>
        </div>
      </form>
      <form class="sign-up-htm" action="./api/user/signup.php" method="POST">
        <div class="group">
          <label for="user" class="label">Username</label>
          <input id="username" name="username" type="text" class="input">
        </div>
        <div class="group">
          <label for="pass" class="label">Password</label>
          <input id="password" name="password" type="password" class="input" data-type="password">
        </div>
        <div class="group">
          <label for="pass" class="label">Confirm Password</label>
          <input id="pass" type="password" class="input" data-type="password">
        </div>
        <div class="group">
          <input type="submit" class="button" value="Sign Up">
        </div>
        <div class="hr"></div>
        <div class="foot-lnk">
          <label for="tab-1">Already Member?</a>
        </div>
      </form>
    </div>
  </div>
</div>


</body>

</html>
Now go to the “assets” folder and create a new folder as “css” and create a new file there as “style.css” and paste this code there
body{
  margin:0;
  color:#6a6f8c;
  background:#c8c8c8;
  font:600 16px/18px 'Open Sans',sans-serif;
}
*,:after,:before{box-sizing:border-box}
.clearfix:after,.clearfix:before{content:'';display:table}
.clearfix:after{clear:both;display:block}
a{color:inherit;text-decoration:none}

.login-wrap{
  width:100%;
  margin:auto;
  margin-top: 30px;
  max-width:525px;
  min-height:570px;
  position:relative;
  background:url(http://codinginfinite.com/demo/images/bg.jpg) no-repeat center;
  box-shadow:0 12px 15px 0 rgba(0,0,0,.24),0 17px 50px 0 rgba(0,0,0,.19);
}
.login-html{
  width:100%;
  height:100%;
  position:absolute;
  padding:90px 70px 50px 70px;
  background:rgba(40,57,101,.9);
}
.login-html .sign-in-htm,
.login-html .sign-up-htm{
  top:0;
  left:0;
  right:0;
  bottom:0;
  position:absolute;
  -webkit-transform:rotateY(180deg);
          transform:rotateY(180deg);
  -webkit-backface-visibility:hidden;
          backface-visibility:hidden;
  transition:all .4s linear;
}
.login-html .sign-in,
.login-html .sign-up,
.login-form .group .check{
  display:none;
}
.login-html .tab,
.login-form .group .label,
.login-form .group .button{
  text-transform:uppercase;
}
.login-html .tab{
  font-size:22px;
  margin-right:15px;
  padding-bottom:5px;
  margin:0 15px 10px 0;
  display:inline-block;
  border-bottom:2px solid transparent;
}
.login-html .sign-in:checked + .tab,
.login-html .sign-up:checked + .tab{
  color:#fff;
  border-color:#1161ee;
}
.login-form{
  min-height:345px;
  position:relative;
  -webkit-perspective:1000px;
          perspective:1000px;
  -webkit-transform-style:preserve-3d;
          transform-style:preserve-3d;
}
.login-form .group{
  margin-bottom:15px;
}
.login-form .group .label,
.login-form .group .input,
.login-form .group .button{
  width:100%;
  color:#fff;
  display:block;
}
.login-form .group .input,
.login-form .group .button{
  border:none;
  padding:15px 20px;
  border-radius:25px;
  background:rgba(255,255,255,.1);
}
.login-form .group input[data-type="password"]{
  text-security:circle;
  -webkit-text-security:circle;
}
.login-form .group .label{
  color:#aaa;
  font-size:12px;
}
.login-form .group .button{
  background:#1161ee;
}
.login-form .group label .icon{
  width:15px;
  height:15px;
  border-radius:2px;
  position:relative;
  display:inline-block;
  background:rgba(255,255,255,.1);
}
.login-form .group label .icon:before,
.login-form .group label .icon:after{
  content:'';
  width:10px;
  height:2px;
  background:#fff;
  position:absolute;
  transition:all .2s ease-in-out 0s;
}
.login-form .group label .icon:before{
  left:3px;
  width:5px;
  bottom:6px;
  -webkit-transform:scale(0) rotate(0);
          transform:scale(0) rotate(0);
}
.login-form .group label .icon:after{
  top:6px;
  right:0;
  -webkit-transform:scale(0) rotate(0);
          transform:scale(0) rotate(0);
}
.login-form .group .check:checked + label{
  color:#fff;
}
.login-form .group .check:checked + label .icon{
  background:#1161ee;
}
.login-form .group .check:checked + label .icon:before{
  -webkit-transform:scale(1) rotate(45deg);
          transform:scale(1) rotate(45deg);
}
.login-form .group .check:checked + label .icon:after{
  -webkit-transform:scale(1) rotate(-45deg);
          transform:scale(1) rotate(-45deg);
}
.login-html .sign-in:checked + .tab + .sign-up + .tab + .login-form .sign-in-htm{
  -webkit-transform:rotate(0);
          transform:rotate(0);
}
.login-html .sign-up:checked + .tab + .login-form .sign-up-htm{
  -webkit-transform:rotate(0);
          transform:rotate(0);
}

.hr{
  height:2px;
  margin:60px 0 50px 0;
  background:rgba(255,255,255,.2);
}
.foot-lnk{
  text-align:center;
}
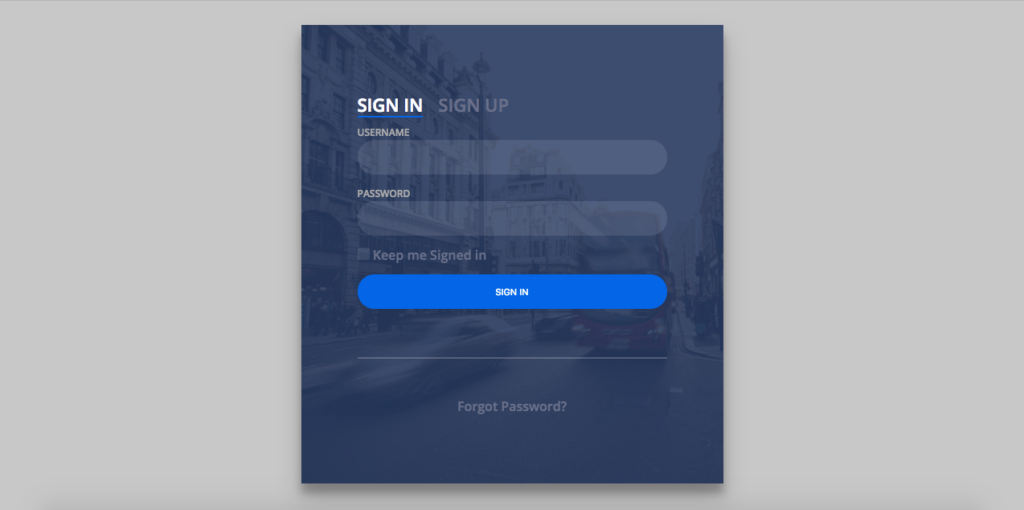
Now you’ll see the page same as this
Connecting HTML page with Webservices
Download Login & Signup API from Github you can also create these API following my previous post, Restful Web Services in PHP Example – PHP + MySQL Best Practice
setup Database and paste “api” folder inside “app” folder.
all done, Now you can run your index.html through localhost.
You might be Interested in:
Here are some more Tutorial for creating Web Application & CRUD Operations using PHP & MySQL.


no comments
thank u sir
Thanks a lot Sir
Hello lalitthakur, am getting this error on both signup and login ,
Please share your error with me. I’ll try to solve. here’s my Email: [email protected]
A-O-A sir,
I hope you will be fine. sir, I’m this problem ” {“status”:false,”message”:”Invalid Username or Password!”}” while username and password are the same as in database kindly help me with this.
thanks a lot.
sir, I am a beginner .I have downloaded all of your code files and put them in htdocs of mamp server.
While i am opening the login page its showing nothing please explain me in details how to connect my database with php files
First of all, you need to import the Database I provided in the Article, in your local MySQL Server. Then update the Database credentials in database.php file, here:
api -> config -> database.php