
Everything you need to know about using Google Maps in Cab Booking App (Part 1)
Hey, Android Developers! I would like to share my experience with you guys when I got to make Cab booking application. I learn a lot during the development of this application. The following are the features which we’re going to discuss in this article:
- Show GoogleMaps.
- Animate multiples marker simultaneously on GoogleMaps.
- Calculate the distance from the PinView location to the nearest driver.
- Show multiples online drivers on GoogleMaps.
- Animate the User PinView and show nearest driver distance time.
- Working with Firebase Real-time Database.
- Reverse Geocode location where the user drags current
Marker.
What our app will be?
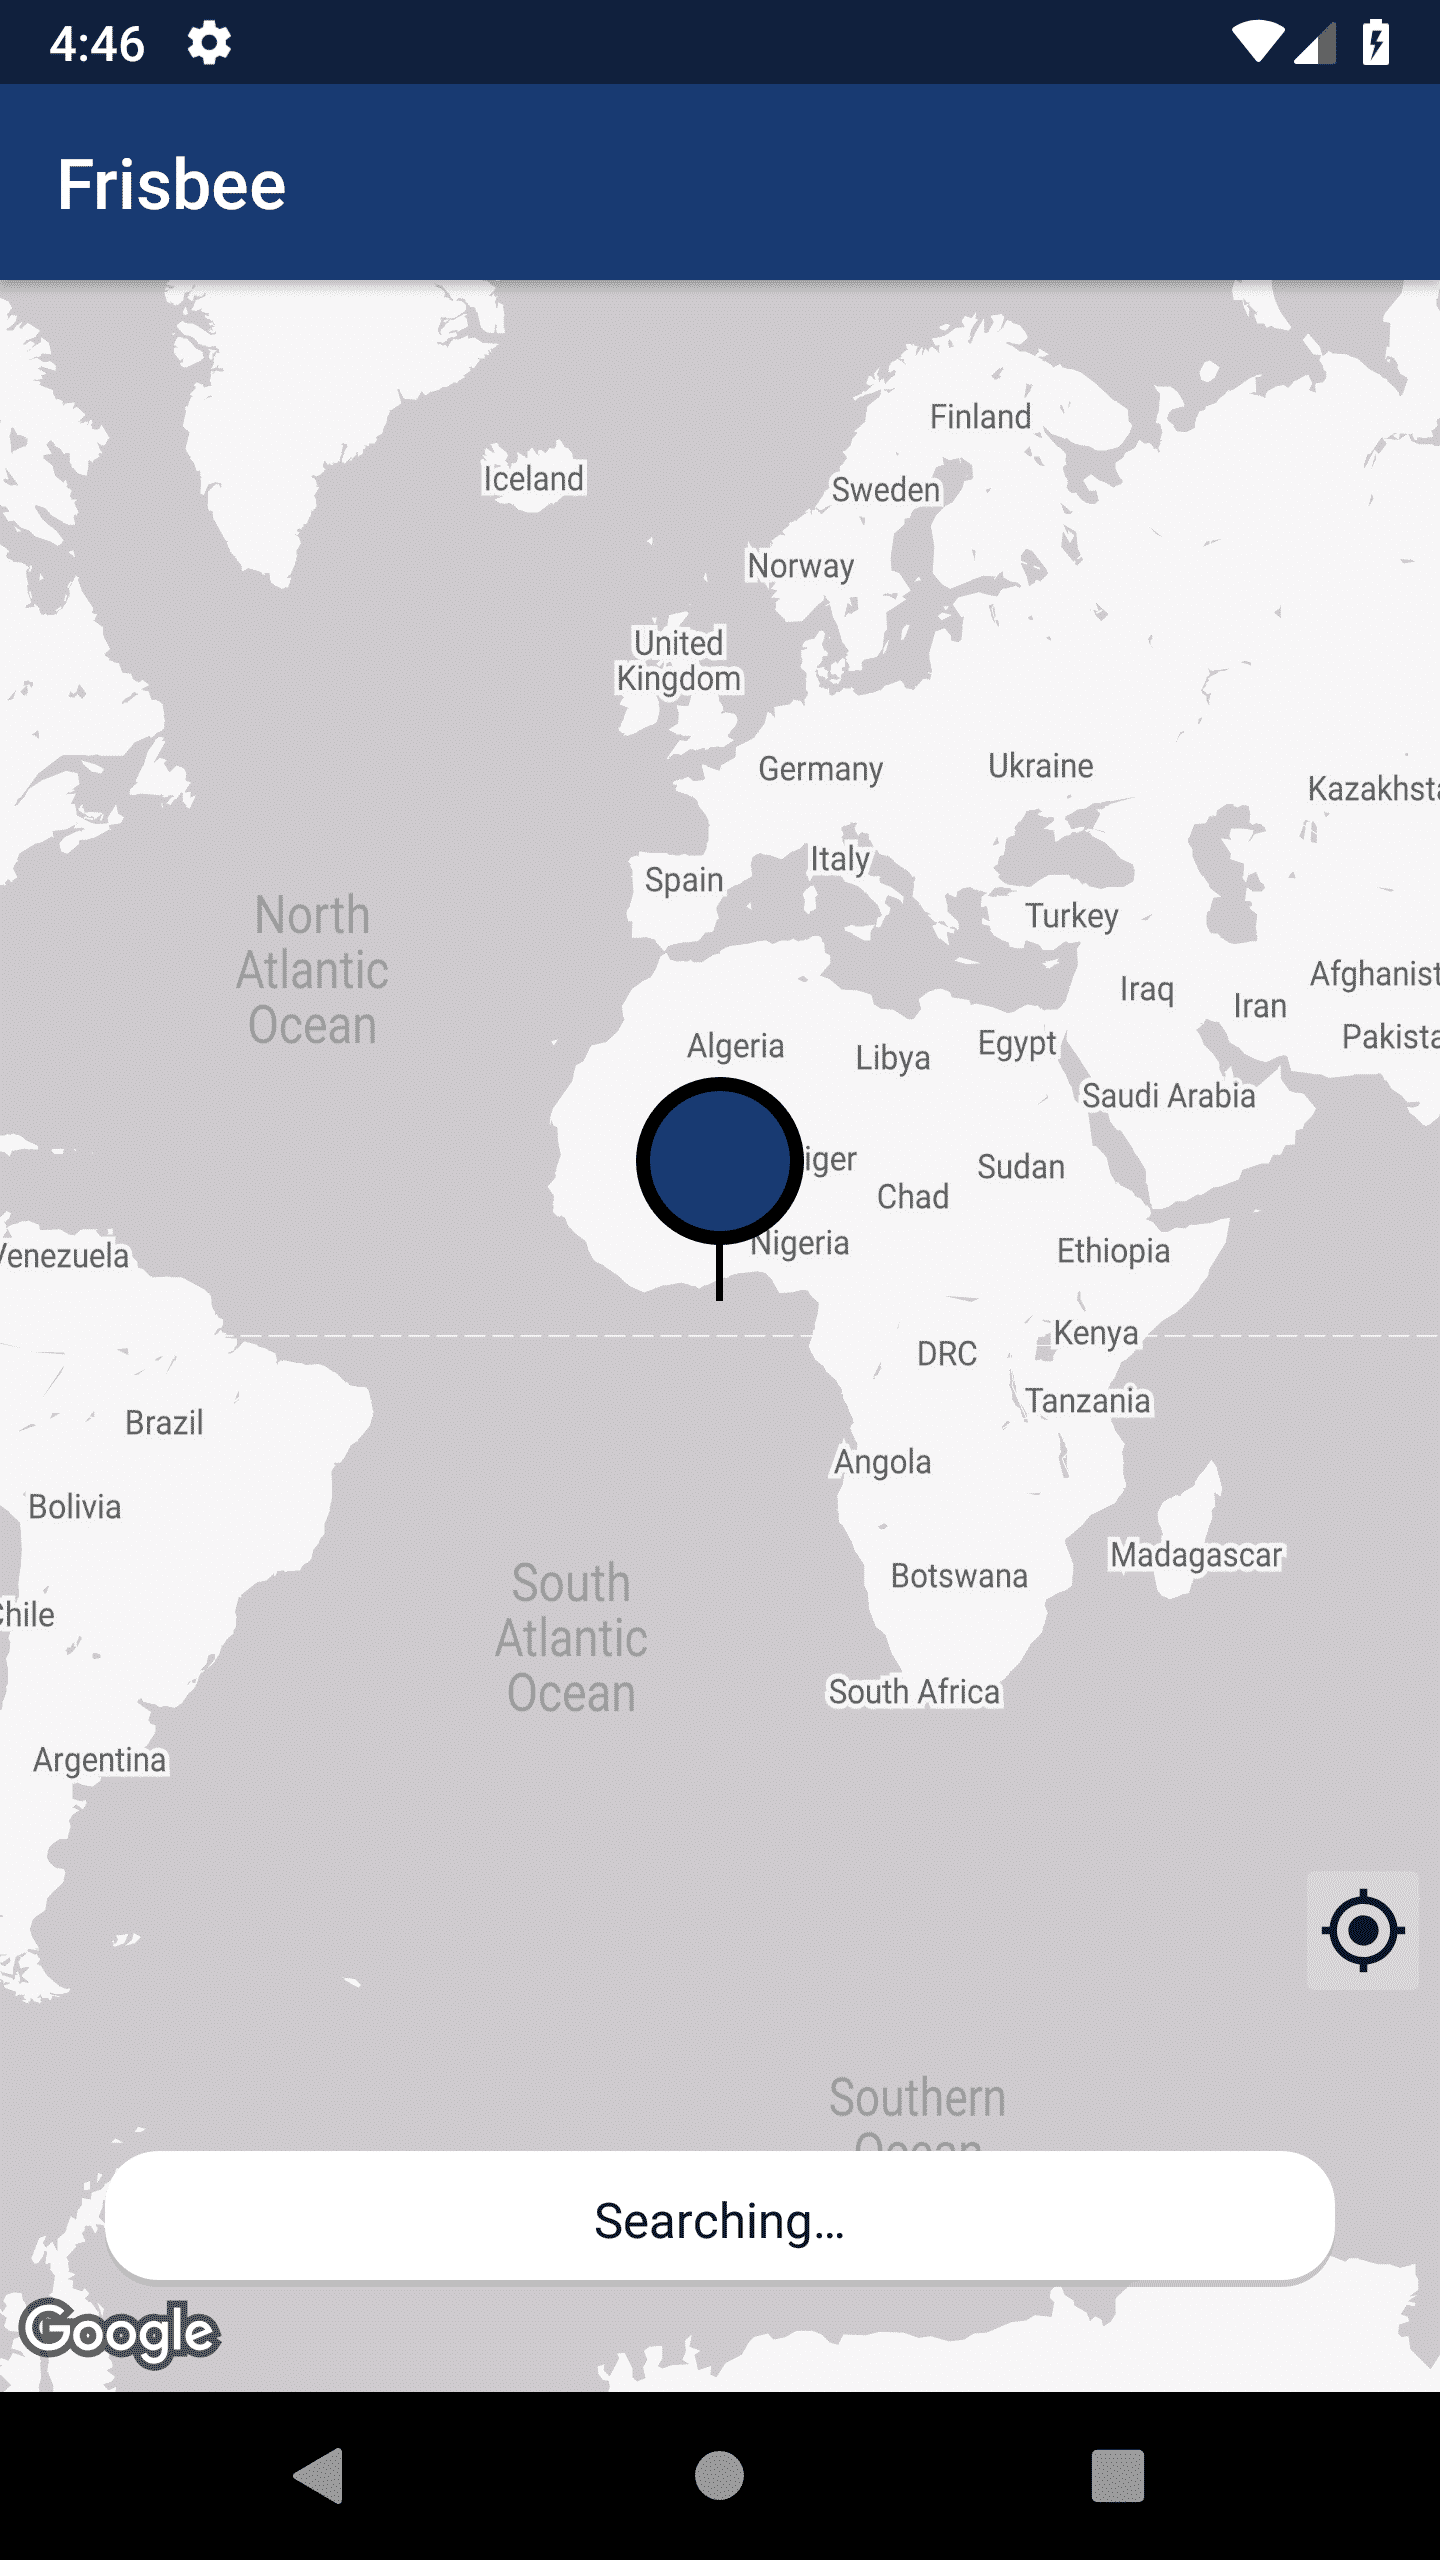
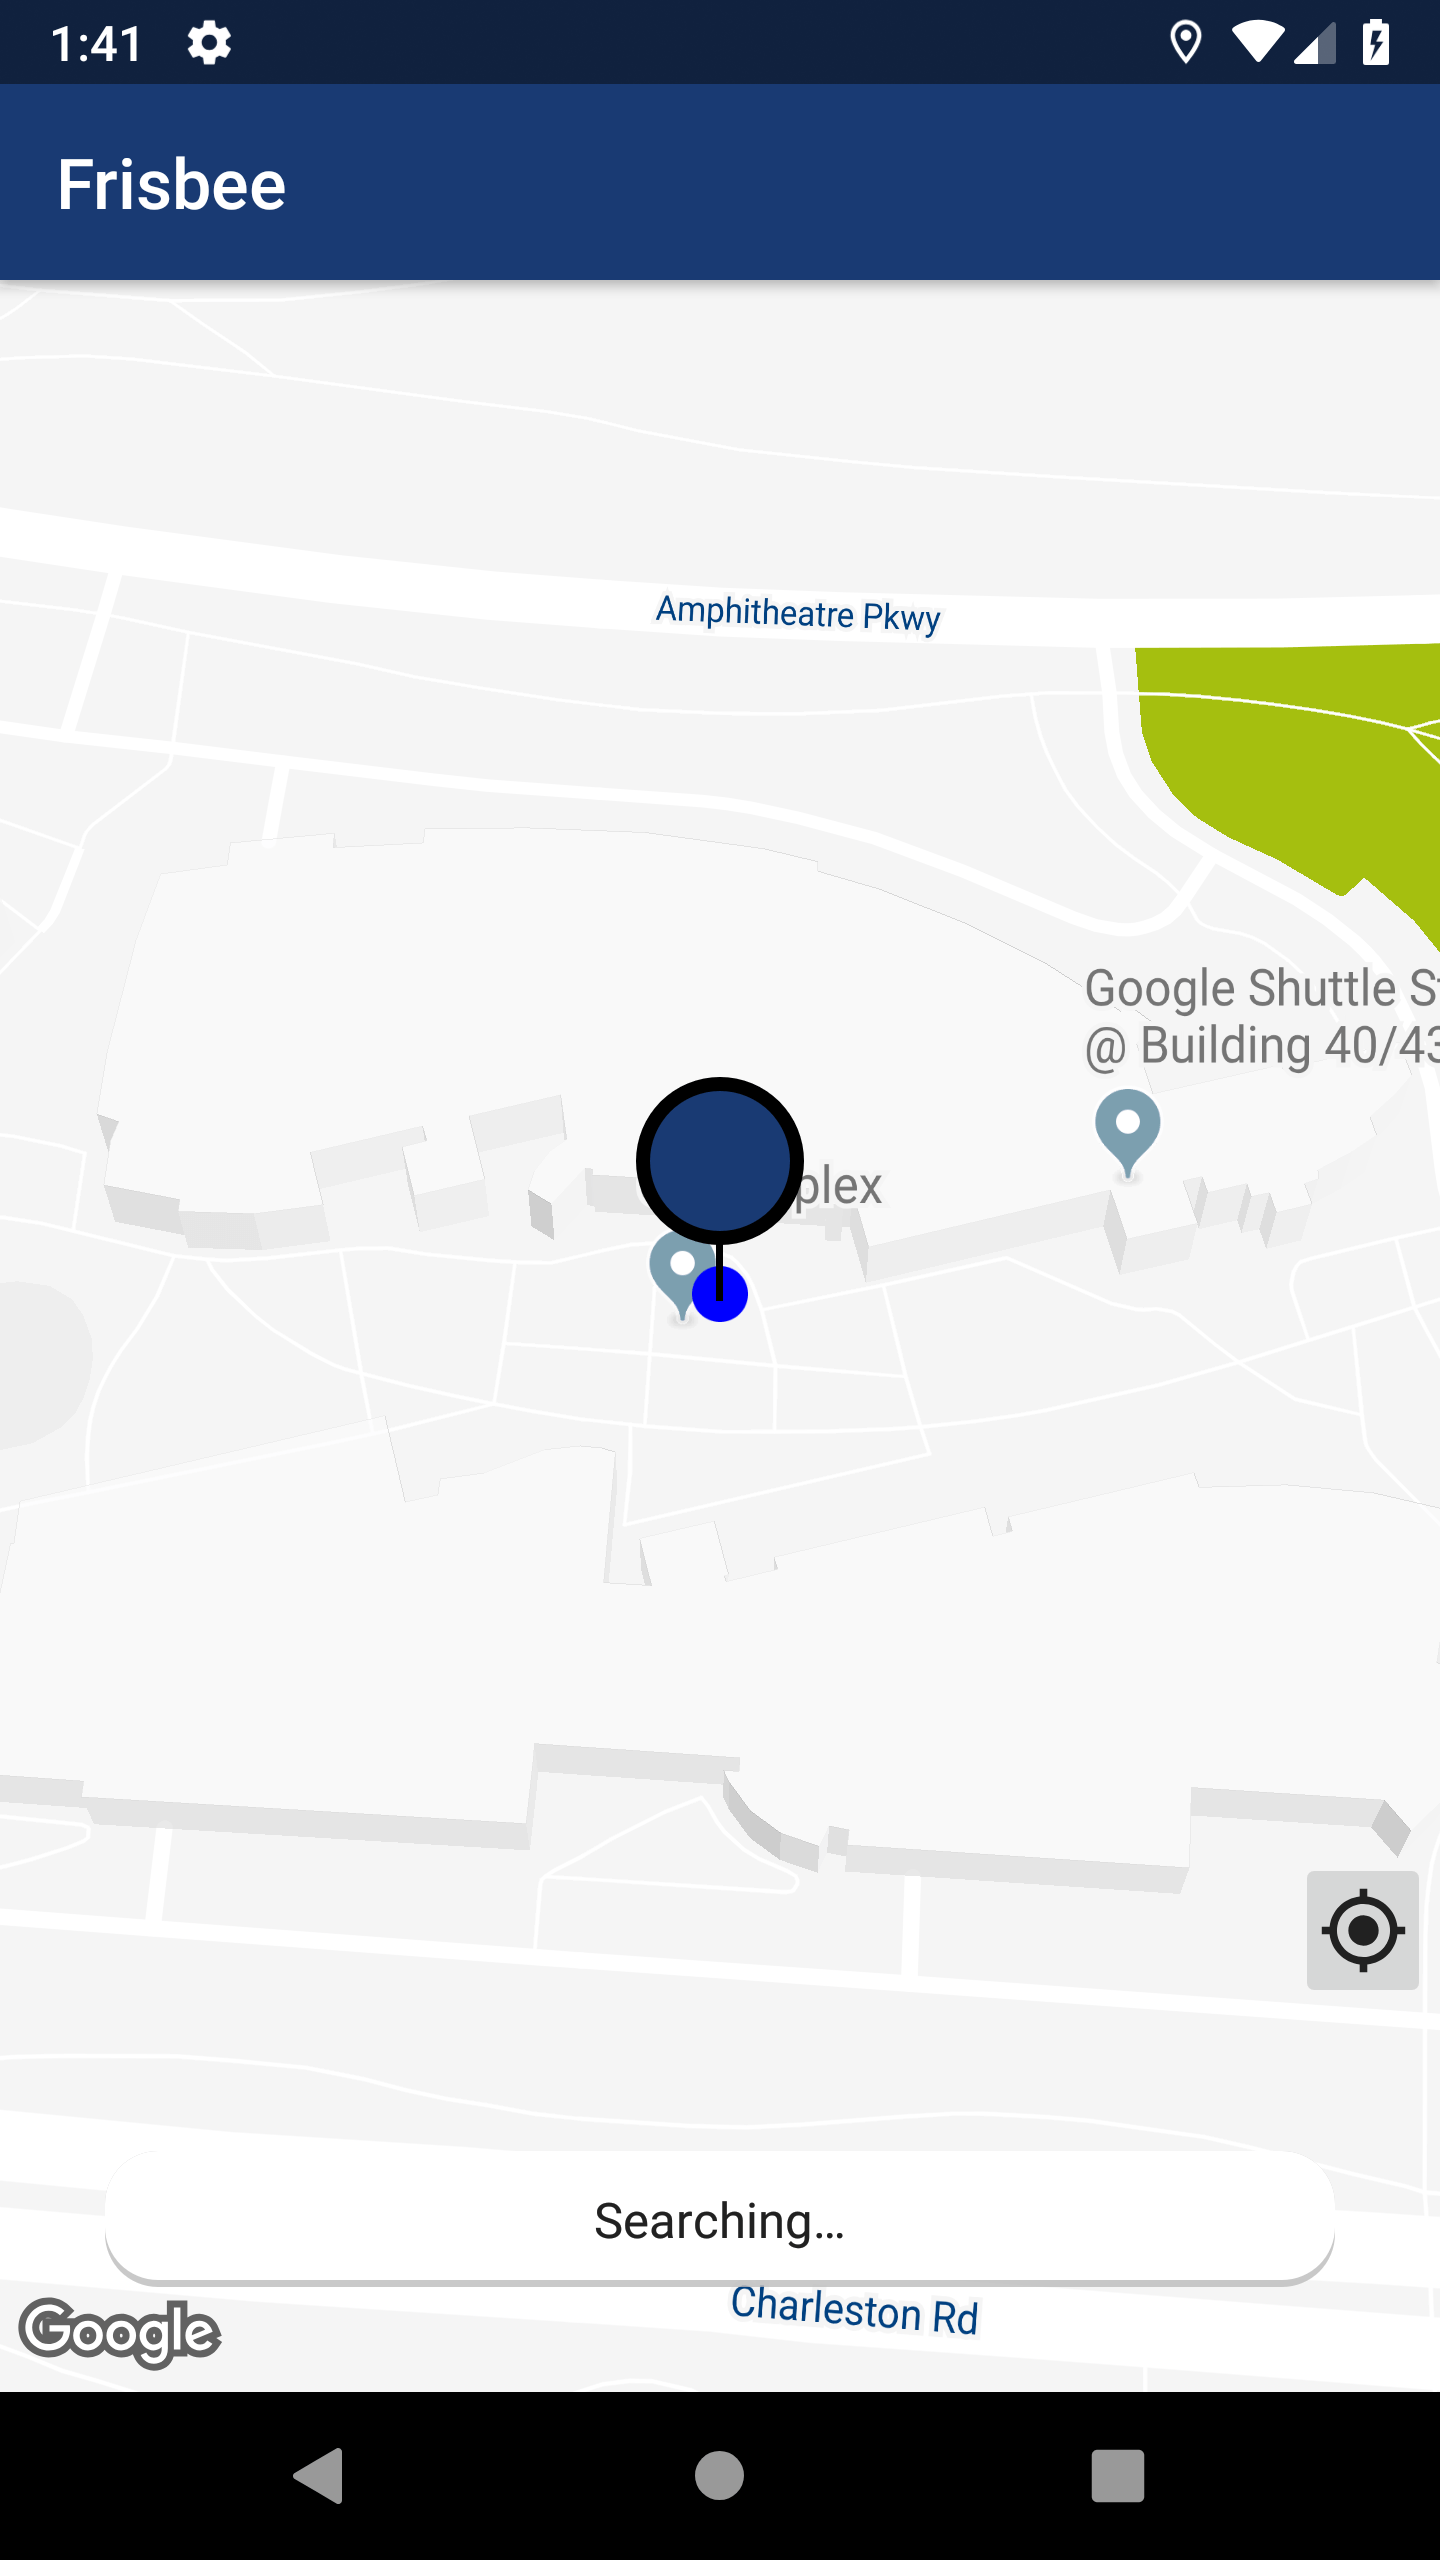
To show you how to implement above mention features in an app, we’re going to create a simple app called Frisbee: it will start listening to drivers from firebase realtime database and show the online drivers in the application. Animate the multiple driver markers simultaneously whenever their current location changed in firebase realtime database. Calculate the distance from PinView location to the nearest driver location, animate the Marker while calculating the distance and show the result inside the custom Marker.
Before to start coding the Frisbee, I want to show you guys the demo of application:
Prerequisite
- Requires Google Maps API key to show Google Maps. Go to Developer Console -> Sign In with your Gmail account -> Create a new project -> API & Services -> Library -> Search for Google Maps and click on Maps SDK for Android -> Enable API. After enabling the Maps SDK, go to API & Services -> Credentials -> Create Credentials -> API key -> Restrict API key for your Android project.
- Google Distance Matrix API key to calculate distance. Go to the previously created project in Developer Console -> API & Services -> Library -> Search for Distance Matrix and click on Distance Matrix API -> Enable API. After enabling the Distance Matrix API, go to API & Services -> Credentials -> Create Credentials -> API key -> Restrict key, change the name (optional), and finally click on save button. To add restrictions to an API key see this link.
Note: This tutorial will not focus on how to build the app for scale or for performance. It’s basically designed so that you can have fun while building it, and how you can create something that mimics Uber or Careem. Think of this as though building a Minimum Viable Product to demonstrate your idea or startup, for a proof-of-concept.
Now that everything is done, let’s make our hands dirty and create a new Android Studio Empty project:
Android Studio
In Android Studio go to Create Android Project, press next twice and select Empty Activity, then finish. After the Android Studio gradle builds successfully you’re ready to do the code. You can see MainActivity like below:
import android.support.v7.app.AppCompatActivity
import android.os.Bundle

class MainActivity : AppCompatActivity() {

    override fun onCreate(savedInstanceState: Bundle?) {
        super.onCreate(savedInstanceState)
        setContentView(R.layout.activity_main)
    }
}
Before start coding our application we need to add some dependencies to our app level build.gradle file. The following shows the dependencies:
// Google dependencies
implementation 'com.google.android.gms:play-services-maps:16.0.0'
implementation 'com.google.firebase:firebase-database:16.0.5'
implementation 'com.google.android.gms:play-services-location:16.0.0'

// Material dialog dependency
implementation 'com.afollestad.material-dialogs:core:0.9.6.0'

// ViewModel dependencies
implementation 'android.arch.lifecycle:viewmodel:1.1.1'
implementation 'android.arch.lifecycle:extensions:1.1.1'

// Kotlin coroutines dependencies
implementation 'org.jetbrains.kotlinx:kotlinx-coroutines-core:1.0.1'
implementation 'org.jetbrains.kotlinx:kotlinx-coroutines-android:1.0.1'

// Map services dependency
implementation 'com.google.maps:google-maps-services:0.2.4'
Sync the project and everything should be fine without any kind of gradle error.
Let’s make our activity_main.xml file to show the views on the screen.
<?xml version="1.0" encoding="utf-8"?>
<RelativeLayout
        xmlns:android="http://schemas.android.com/apk/res/android"
        xmlns:tools="http://schemas.android.com/tools"
        android:layout_width="match_parent"
        android:layout_height="match_parent"
        android:id="@+id/mainActivityRootView"
        tools:context=".activities.main.ui.MainActivity">

    // 1
    <fragment xmlns:tools="http://schemas.android.com/tools"
              android:id="@+id/map"
              android:name="com.google.android.gms.maps.SupportMapFragment"
              android:layout_width="match_parent"
              android:layout_height="match_parent"
              tools:context="spartons.com.frisbee.activities.main.ui.MainActivity"/>

    // 2
    <FrameLayout
            android:layout_width="wrap_content"
            android:layout_height="wrap_content"
            android:layout_centerHorizontal="true"
            android:layout_centerVertical="true">

        <FrameLayout
                android:layout_width="wrap_content"
                android:layout_height="wrap_content"
                android:layout_marginBottom="100dp"
                tools:ignore="UselessParent">

            <FrameLayout
                    android:id="@+id/pinViewLine"
                    android:layout_width="2dp"
                    android:layout_height="wrap_content"
                    android:layout_gravity="center"
                    android:layout_marginTop="40dp"
                    android:background="@drawable/line_background"/>

            <FrameLayout
                    android:id="@+id/pinViewCircle"
                    android:layout_width="wrap_content"
                    android:layout_height="wrap_content"
                    android:layout_gravity="center"
                    android:background="@drawable/circle_background">

                <TextView
                        android:id="@+id/pinTimeTextView"
                        android:layout_width="40dp"
                        android:layout_height="45dp"
                        android:layout_gravity="top|center_horizontal"
                        android:gravity="center"
                        android:padding="2dp"
                        android:textColor="@android:color/white"
                        android:textSize="12sp"/>

                <ProgressBar
                        android:id="@+id/pinProgressLoader"
                        android:layout_width="45dp"
                        android:layout_height="45dp"
                        android:layout_gravity="top|center_horizontal"
                        android:layout_margin="4dp"
                        android:contentDescription="@null"
                        android:indeterminate="true"
                        android:visibility="gone"/>

            </FrameLayout>

        </FrameLayout>

    </FrameLayout>

    //  3
    <TextView
            android:id="@+id/currentPlaceTextView"
            android:layout_width="match_parent"
            android:layout_height="wrap_content"
            android:layout_alignParentBottom="true"
            android:layout_centerInParent="true"
            android:ellipsize="end"
            android:gravity="center"
            android:maxLines="1"
            android:background="@drawable/place_search_style"
            android:layout_margin="30dp"
            android:padding="10dp"
            android:text="@string/search_place"
            android:textColor="@color/colorPrimaryText"/>

    // 4

    <ImageButton
            android:id="@+id/currentLocationImageButton"
            android:layout_width="40dp"
            android:layout_height="wrap_content"
            android:layout_above="@+id/currentPlaceTextView"
            android:layout_alignParentEnd="true"
            android:layout_marginBottom="10dp"
            android:layout_marginEnd="2dp"
            android:contentDescription="@null"
            android:src="@drawable/current_location_icon"
            android:layout_alignParentRight="true"
            android:layout_marginRight="2dp"/>

</RelativeLayout>
Below is the explanation of the above code:
- The
fragmenttag to show the Google Maps. -
FrameLayoutfor the customMarker. The customMarkeris for a user to drag anywhere on the Google Map and set the pick-up location for a ride. -
TextViewfor the current location place name. - Finally, the
ImageButtonis for to moves the camera to a user’s current location.
Build your application and run to view your progress so far.
 There are many key points in this application. So, we’re gonna need to break the application into smaller parts.
I will try to explain as many of lines of code as I can. You can follow looking on commits of code that I published on GitHub. Java application link and Kotlin application link.
1. Initialize The Google Maps
In order to use Google Maps, we need to initialize it first in our MainActivity onCreate method and store the instance of Google Maps so that later we can use it.
class MainActivity : AppCompatActivity() {

    private var googleMap : GoogleMap? = null

    override fun onCreate(savedInstanceState: Bundle?) {
          super.onCreate(savedInstanceState)
           .......
           .......

          val supportMapFragment = supportFragmentManager.findFragmentById(R.id.map) as SupportMapFragment
          supportMapFragment.getMapAsync { googleMap ->
                this.googleMap = googleMap
          }
    }

}
2. Animate Google Maps to user current location:
In this part of an application, we’re going to request user current location from LocationServices and animate the Google Map to that location. Before requesting the last known location from a device we need to check that if the user has PlayServices installed in his/her mobile. Add the below code in MainActivity onCreate method:
if(!uiHelper.isPlayServicesAvailable()) {
     toast("Play Services is not installed!")
     finish()
} else requestLocationUpdates()
If the user has not installed PlayServices in his/her mobile phone then we’re gonna exit the application and show Toast else, we simply request location updates from the device. The UiHelper is the utility class with just a bunch of helper method.
Next, add the following code inside the UiHelper class.
fun isPlayServicesAvailable() : Boolean {
    val googleApiAvailability = GoogleApiAvailability.getInstance()
    val status = googleApiAvailability.isGooglePlayServicesAvailable(context)
    return ConnectionResult.SUCCESS == status
}
As you may have noticed that if the user has PlayServices installed then we’re calling our requestLocationUpdates method. Add the below method inside MainActivity.
private fun requestLocationUpdates() {
        if (!uiHelper.isHaveLocationPermission()) {
            ActivityCompat.requestPermissions(
                this, arrayOf(Manifest.permission.ACCESS_FINE_LOCATION),
                MY_PERMISSIONS_REQUEST_ACCESS_FINE_LOCATION
            )
            return
        }
        viewModel.requestLocationUpdates()
    }
The code above checks if the app has been granted the ACCESS_FINE_LOCATION permission. If it hasn’t, then request it from the user because, starting with Android 6.0, user permission is handled little differently than before. You don’t request permission during the installation of your app; rather, you request them at runtime when the permission is actually required.
If the user granted the location permission then simply we ‘re gonna call our requestLocationUpdates method inside the ViewModel. All of our network calls and logical stuff will be handled inside MainActivityViewModel and listens to the data via LiveData.
You can check out my other articles on LiveData and ViewModel.
Add the below method inside MainActivityViewModel class.
fun requestLocationUpdates() {
   locationProviderClient.requestLocationUpdates(uiHelper.getLocationRequest(), locationCallback, Looper.myLooper());
}
The FusedLocationProviderClient request location updates with LocationCallback on a specified Looper. Also, you may have noticed that we need a locationCallback and LocationRequest to successfully receive location updates.
Add the following getLocationRequest method inside the UiHelper class.
fun getLocationRequest() : LocationRequest {
   val locationRequest = LocationRequest.create()
   locationRequest.priority = LocationRequest.PRIORITY_HIGH_ACCURACY
   locationRequest.interval = 3000
   return locationRequest
}
The LocationRequest object is usually used to request a quality of service for location updates. You see we’re setting high priority accuracy and location interval to 3 seconds. Now after every 3 seconds our application will receive a Location update via LocationCallback which we’ve passed previously when requesting location updates.
After adding LocationRequest we only need to create our LocationCallback instance. Add the LocationCallback object creation as follows inside MainActivityViewModel class.
private val locationCallback: LocationCallback = object : LocationCallback() {

    override fun onLocationResult(locationResult: LocationResult?) {
        super.onLocationResult(locationResult)
        if (locationResult?.lastLocation == null) return
        _currentLocation.postValue(locationResult.lastLocation)
    }
}
The onLocationResult method called immediately when the device location information is available. The other thing we’re doing in this method is sending the location back to our MainActivity via LiveData.
Before start observing the current location in MainActivity we need to define this _currentLocation LiveData inside our MainActivityViewModel class.
private val _currentLocation = MediatorLiveData<Location>()

val currentLocation: LiveData<Location> get() = _currentLocation
You see we’re not exposing our MediatorLiveData instance publically instead we simply given a LiveData just to observe the location. By doing this we’re keeping our immutability principle safe.
Now that we’ve successfully requested location updates. Go to MainActivity and paste the following code inside the onCreate method to observe the user’s current location from MainActivityViewModel.
viewModel.currentLocation
         .observe(this, Observer<Location> { location ->
               if (firstTimeFlag) {
                        firstTimeFlag = false;
                        animateCamera(location);
               }
               showOrAnimateMarker(location);
         })
The Observer interface is immediately invoked providing the most recent Location stored in currentLocation. The firstTimeFlag is our globally initialized bool, a default set to true. The reason we’re checking the firstTimeFlag condition, is because we need to animate the Google Maps camera to user current location when a user opens the application only the first time. After that, we simply animate the user current location Marker from previous coordinates to new coordinates.
Add the below animateCamera method inside MainActivity class.
private fun animateCamera(location : Location) {
     val cameraUpdate = googleMapHelper.buildCameraUpdate(location)
     googleMap.animateCamera(cameraUpdate, 10, null)
}
The animateCamera method animates the camera to the user’s current location. The GoogleMapHelper class provides several utility methods (CameraUpdate, default map settings, UserMarker) for Google Maps.
Next, add the following buildCameraUpdate method inside GoogleMapHelper class.
fun buildCameraUpdate(location: Location): CameraUpdate {
    val cameraPosition = CameraPosition.Builder()
        .target(LatLng(location.latitude, location.longitude))
        .tilt(TILT_LEVEL.toFloat())
        .zoom(ZOOM_LEVEL.toFloat())
        .build()
    return CameraUpdateFactory.newCameraPosition(cameraPosition)
}
Now add the showOrAnimateMarker method in the MainActivity class.
private fun showOrAnimateMarker(Location location) {
     if(currentLocationMarker == null){
           currentLocationMarker = googleMap.addMarker(googleMapHelper.getUserMarker(location))
     } else {
         MarkerAnimationHelper.animateMarkerToGB(currentLocationMarker, location, LatLngInterpolator.Spherical())
     }
}
You see first we check if the currentLocatinMarker is null then we create a new MarkerOptions with the help of GoogleMapHelper utility class, add Marker inside googleMap and store the Marker instance in the currentLocationMarker. Afterward, if it is not null then we simply animate the currentLocationMarker to user new location.
The LatLngInterpolator and MarkerAnimationHelper class are same which I explain in my previous article.
Build and run to view your progress so far. You should see a pin on your location and also your blue dot location Marker will animate if you’re traveling, walking, running etc.
 Now that everything is done for showing the current location on Google Map and animate the Marker with user current location let’s start building our third application part.
3. Reverse Geocode PinView Coordinates And Show PlaceName
In order to Reverse Geocode the coordinates, we need to have user PinView Location. We can easily get these coordinates from CameraPosition target method. The target method will always give us the center point coordinates of Google Map which we see on screen and our PinView also stays in the middle of the screen. Now if we get the center point coordinates from target method, it means we’re getting the PinView coordinates.
Another thing we need to discuss is this, where do we call our Reverse Geocode method? If you guys have clearly see the demo of application you’ll understand that as soon the Google Map camera movement stopped the place name appeared inside the TextView. So, for this, we can easily implement OnCameraIdleListener on MainActivity. The OnCameraIdleListener has its callback function which defines what actions needs to done when the camera stopped its movement. In this callback, we need to get the coordinates from PinView and execute our Reverse Geocode request.
Let’s start the third part of an application by implementing the OnCameraIdleListener on MainActivity.
class MainActivity : AppCompatActivity(), GoogleMap.OnCameraIdleListener {

      private var googleMap : GoogleMap? = null

      override fun onCreate(savedInstanceState: Bundle?) {
            super.onCreate(savedInstanceState)

            .......
            .......

            val supportMapFragment = supportFragmentManager.findFragmentById(R.id.map) as SupportMapFragment supportMapFragment.getMapAsync { googleMap ->
                    googleMap.setOnCameraIdleListener(this)
                    this.googleMap = googleMap
            }
     }
Now in onCameraIdle method, we need to get the current camera target coordinates from Google Maps and call the Reverse Geocode method.
override fun onCameraIdle() {
    val position = googleMap.cameraPosition.target
    viewModel.makeReverseGeocodeRequest(position, geoCoderValue.value);
}
I know you guys must be thinking what is geoCoderValue. The geoCoderValue is nothing just a lazy initialized GeoCoder instance. It’s a good approach that we only initialized our GeoCoder once instead of creating a new instance every time. Add the below code inside the MainActivity to create lazy GeoCoder.
private val geoCoderValue = lazy {
      Geocoder(this)
  }
After creating GeoCoder inside MainActivity add the following code inside the MainActivityViewModel class to Reverse Geocode the PinView coordinates:
fun makeReverseGeocodeRequest(latLng: LatLng, geoCoder: Geocoder) {

    //1
    launch(context = coroutineContext) {

        // 2
        val result = geoCoder.getFromLocation(latLng.latitude, latLng.longitude, 1)
        if (result != null && result.size > 0) {
            val address = result[0]

             // 3
            _reverseGeocodeResult.postValue(address.getAddressLine(0).plus(" , ").plus(address.locality))
        }
    }
}
Here’s what’s going on in the makeReverseGeocodeRequest method:
-
launcha coroutine builder so that our called thread will not be blocked. The Google documentation recommend us to Reverse Geocode in a separate thread instead of UI thread. - The getFromLocation method returns an array of Addresses that are known to describe the area.
- If the
GeoCoderresults are not null then we pass the result to MainActivity via LiveData to show the result in the TextView.
Before going to MainActivity and start observing the result we need to create our _reverseGeocodeResult LiveData inside MainActivityViewModel class.
private val _reverseGeocodeResult = MediatorLiveData<String>()

val reverseGeocodeResult : LiveData<String> = _reverseGeocodeResult
Now that we’ve successfully got the place name from coordinates. Go to MainActivity and paste the following code inside the onCreate method to observe the result from MainActivityViewModel.
viewModel.reverseGeocodeResult
            .observe(this, Observer<String> { placeName
                currentPlaceTextView.text = placeName
            })
When the Observer interface invoked we simply set the placeName in the TextView.
As a result, run the application you’ll see that the place name will be updated when you drag the PinView.
 Alright, guys, that was all for this article. In the next article, we’ll see how to read online drivers from firebase realtime database and show or animate multiple Markers simultaneously.
Thank you for being here and keep reading…


Hello I tried using your code for initializing the map, but it gave me errors, kindly assist me
Hey Charles,
Can you please tell me the error or you can send me on details on my email [email protected].
we can use this map on website??? if yes then tell me how we using on webpage
Hey Qadees,
I’m sorry but this article is only for Android application.
thanks for sharing this information have shared this link with others keep posting such information..
can you provide source?
I’m writing the next post for the cab booking and will add the next part within 24 hours.
Best Regards,
Ahsen Saeed.
Next article link.